There are some fairly simple rules for the implementation of makeup, which can be quickly mastered and put into practice by every woman. The eyes are the mirror of the soul, but they need the right frame. This role is played by high-quality decorative cosmetics for the eyes.
Beautifully made-up eyes make a woman visually younger, highlight the beautiful color of the iris. If you follow a certain technique, you can visually enlarge the eyes or adjust their shape, make them much more expressive. Simple rules for eye makeup will tell you the sequence of actions and will be a guide on how to learn to paint from scratch.
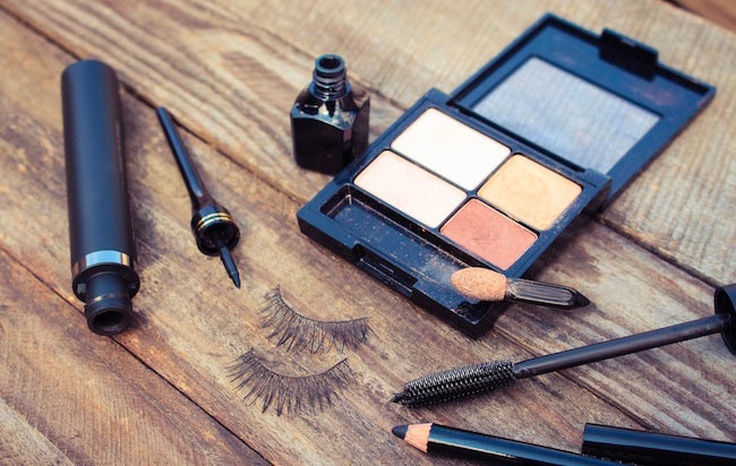
In order to perform high-quality makeup, every woman should have a certain minimum amount of decorative cosmetics, which is used to work with the eyes:
This is the minimum set that every woman supplements with those products that suit her and which she prefers to use.
For most beautiful ladies, the main difficulty with makeup is how to color your eyes with shadows. There are several rules that are easy to remember:
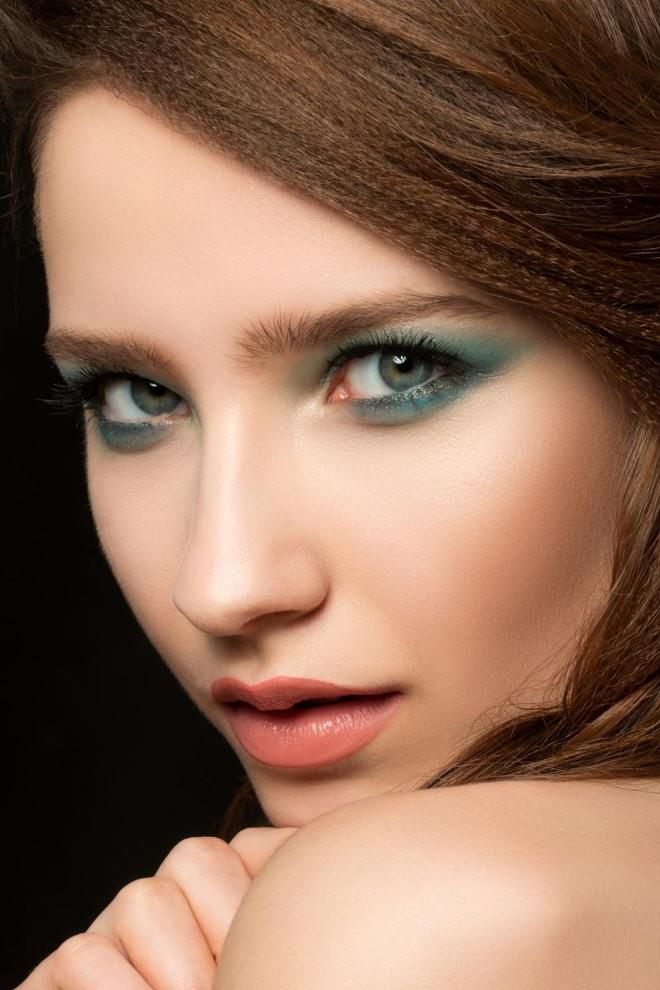
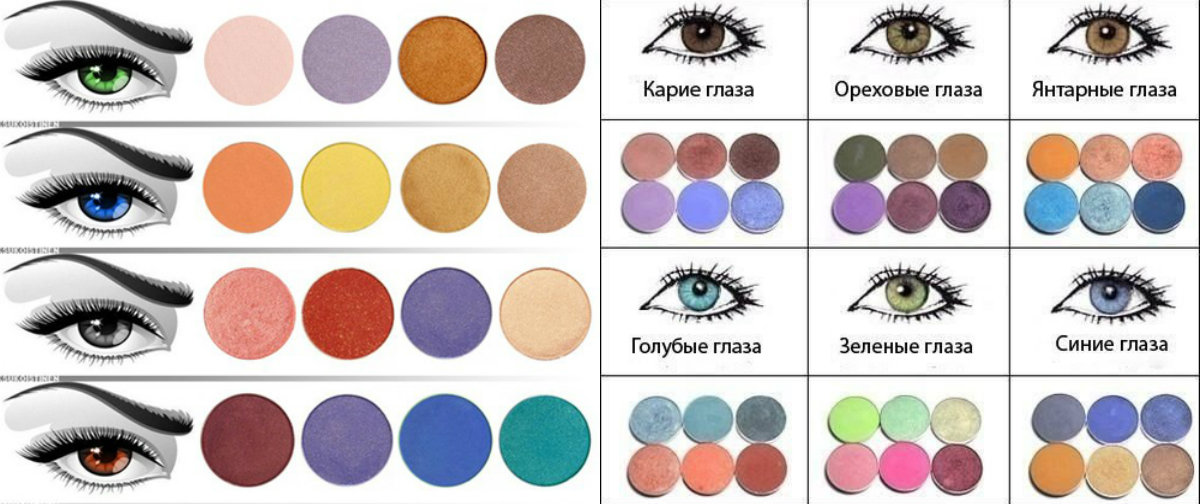
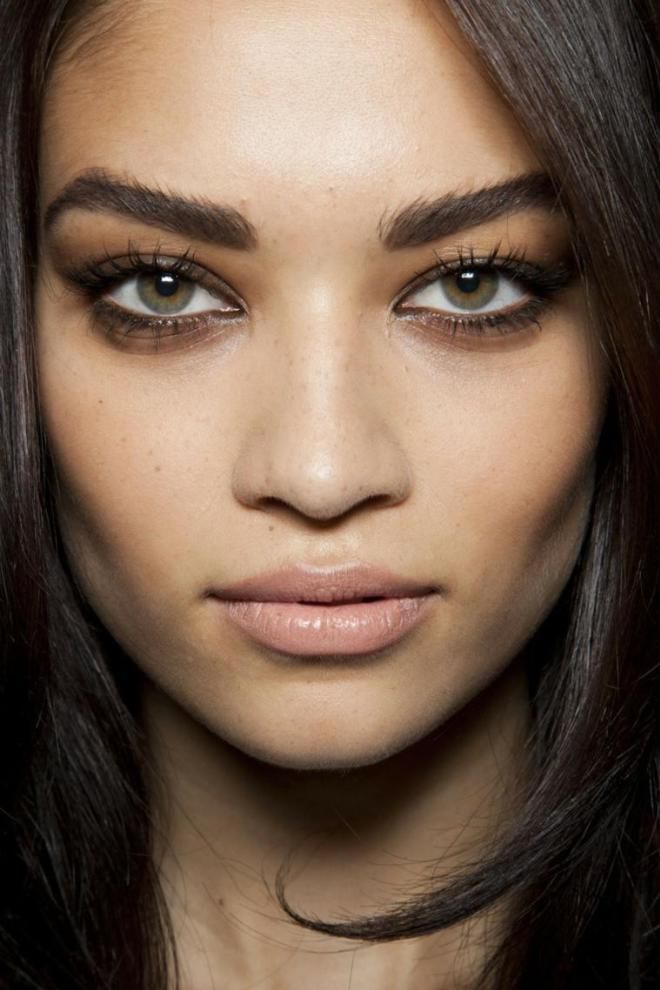
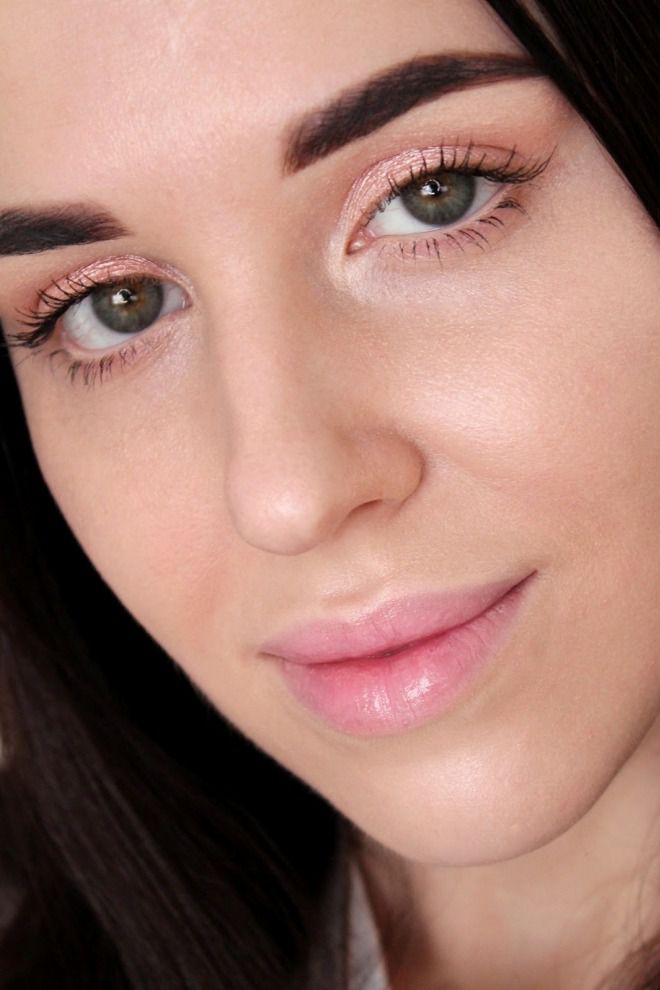
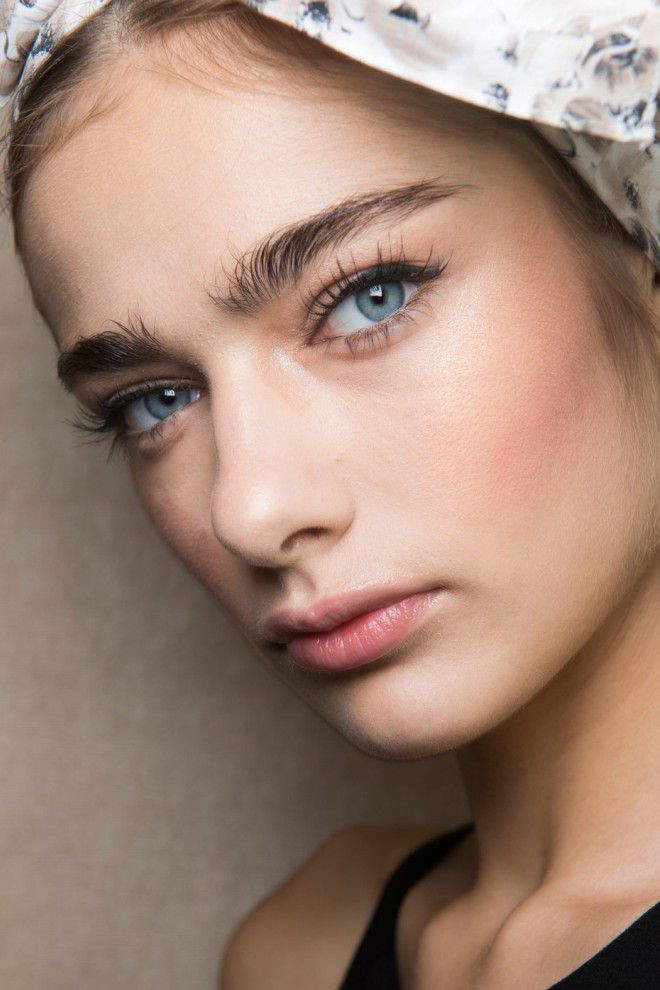
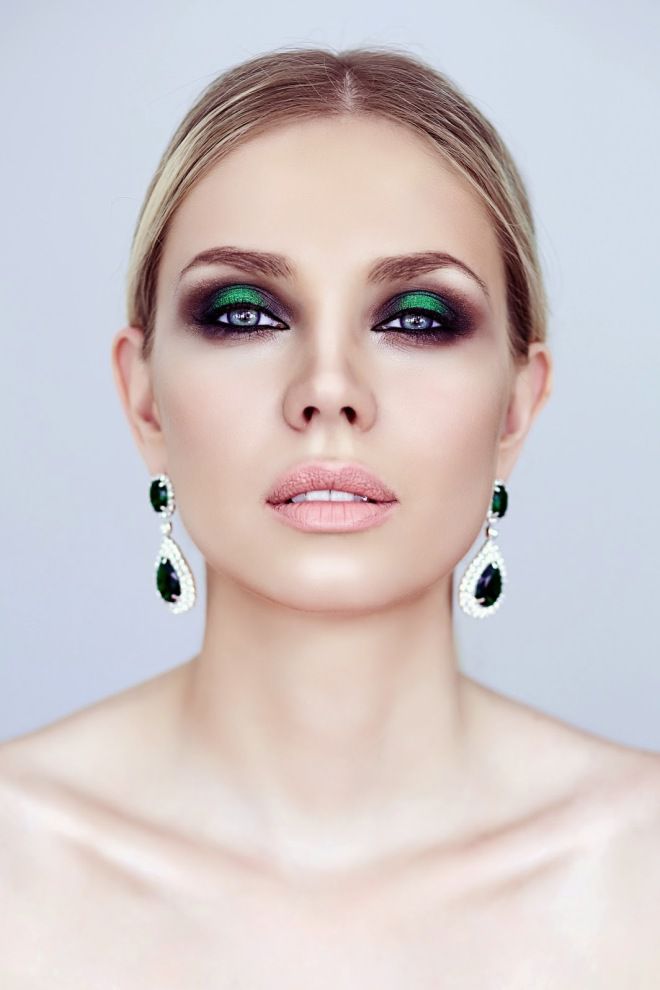
Matching eye shadow is best done by contrast. Such shadows highlight the shade of the eyes and make it much brighter and juicier. For example, blue eyes beautifully accentuate the brown shades of shadows, gray eyes are beautiful with blue, blue, greenish tones, green eyes become simply emerald next to purple and plum flowers, and brown eyes are good with many colors, the main thing is to choose them according to color temperature.
Warm shades will “ask” for softer warm shades of shades, and a cold brown color will be good with gray, blue, cold green and purple colors.
Some colors are neutral and work well with different eye colors. These are all shades of gray and black, cold taupe, which is often called “taup” or “top”.
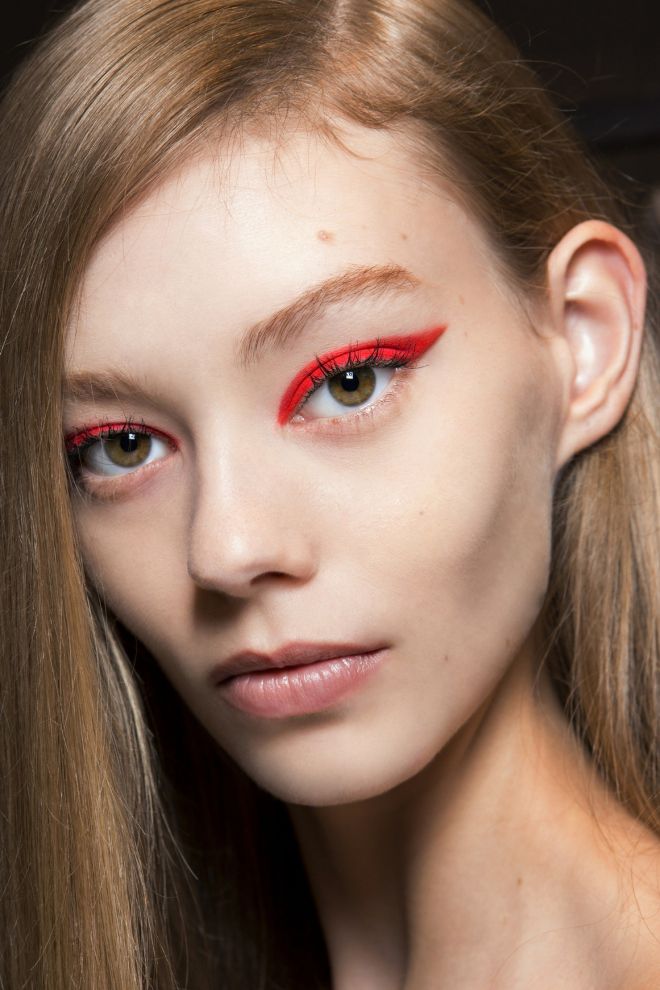
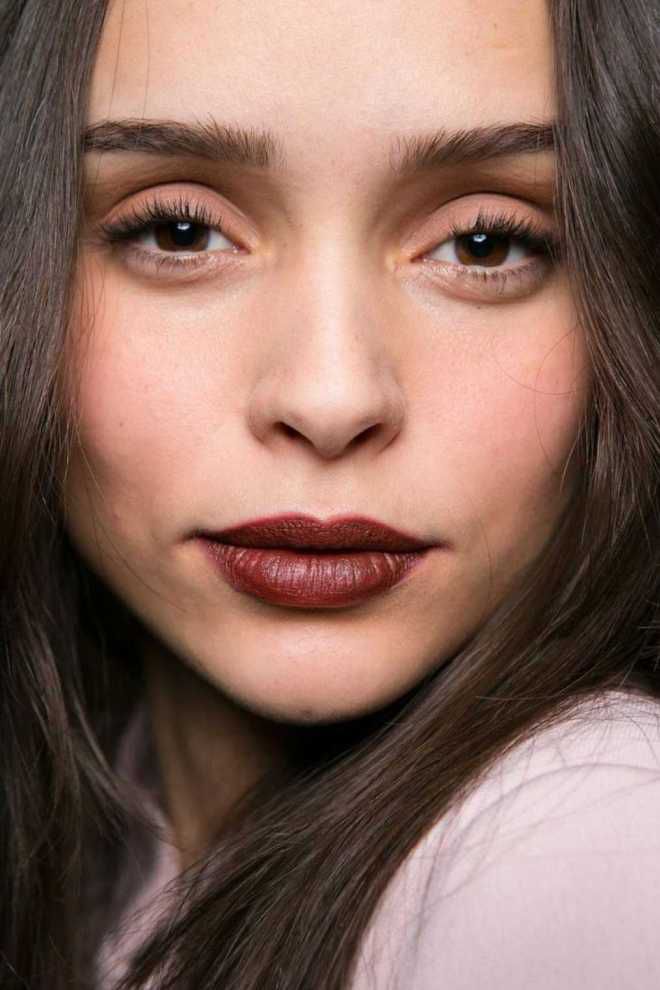
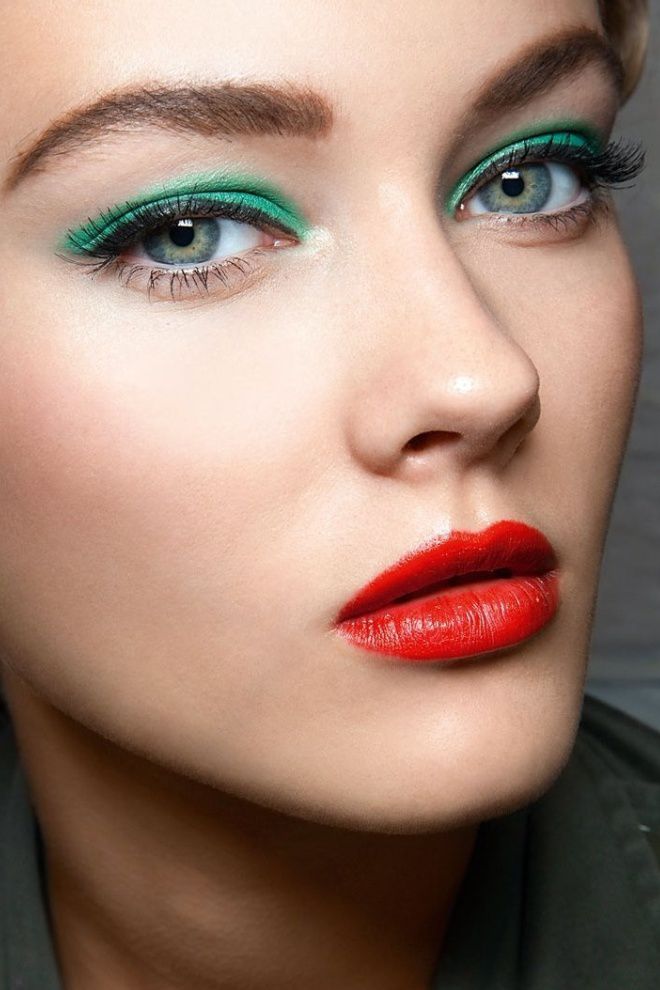
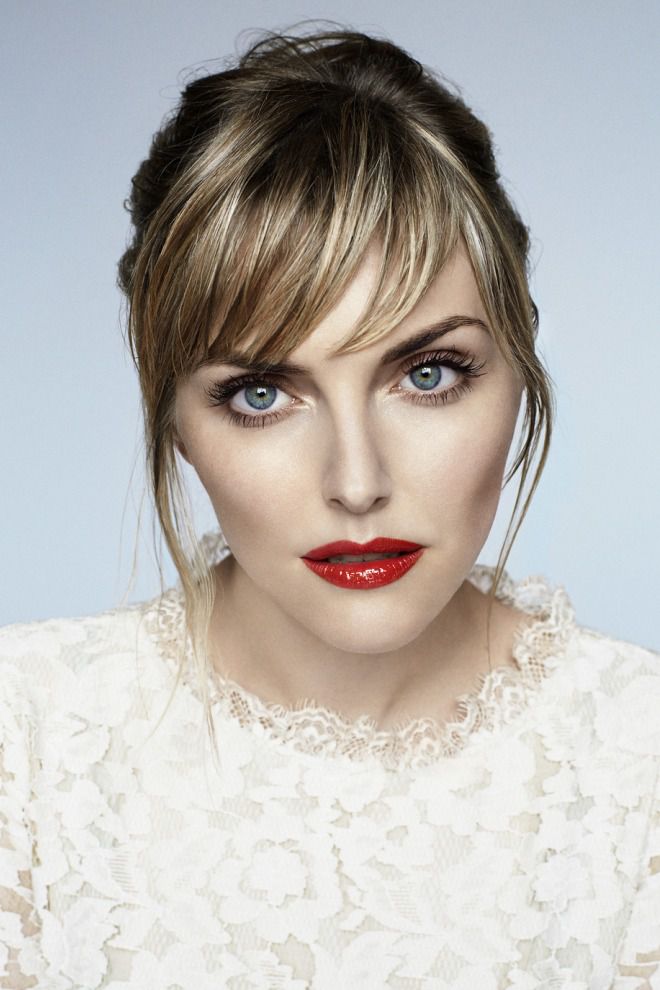
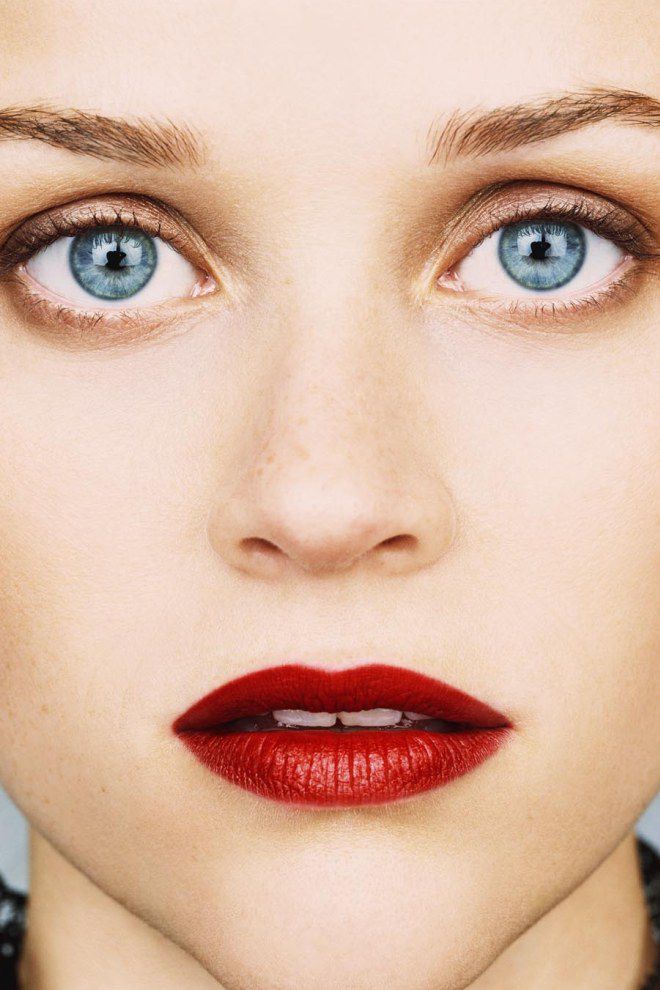
Fashionable red shadows can turn a woman into a tearful or sick one with sore eyes, but it is worthwhile to make red one darker at the outer corner of the eye and draw a thin line at the eyelash line with a dark pencil or eyeliner, as the makeup becomes very stylish and effective.
It is believed that matte shadows or those with a soft, unobtrusive satin sheen are best suited for daytime.
Shimmer, highly shiny, frost and glitter shadows are suitable for evening out, and colored pigments are often used to create stage or carnival makeup.
You can do eye makeup using several specially designed tools or apply one or two products. For large expressive eyes, it is enough to use only separating and lengthening mascara, carefully selecting eyelashes. To increase the eyes and change their shape will require more makeup and effort, but the result is worth it.
Important! When choosing cosmetics for the eyes, focus on hypoallergenic products. If any of the types of cosmetics provokes an allergy, part with him mercilessly.
Happy owners of large eyes can only use mascara - and their eyes sparkle with precious stones. Those women who have small eyes do not have this advantage, but cosmetics will allow them to quickly make their eyes larger.
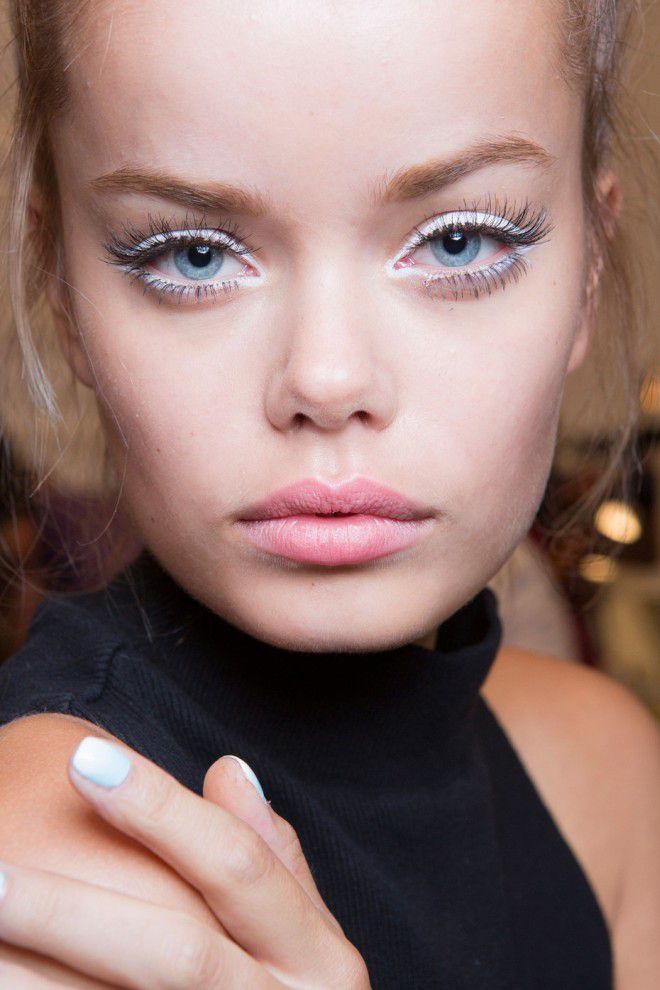
The easiest way to enlarge your eyes quickly is to underline the water line of the lower eyelid with a light pencil-kayal. White color looks a little unnatural, so it is best to stay on a beige or pinkish kayal. Together with it, you can use a thin line of dark eyeliner along the eyelash growth line on the upper eyelid, slightly departing from the contour, and then thickly apply upper mascara with dark mascara. This technique allows you to visually enlarge your eyes and make your eyes “wide open”. During the day, the pencil on the water line needs to be periodically updated, so it should always be present in every woman’s cosmetic bag.
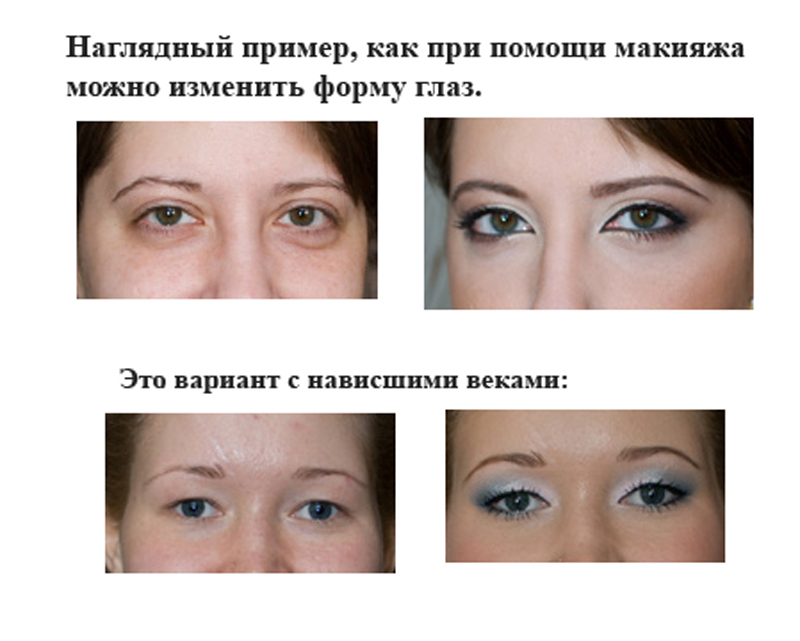
With the help of shadows, pencil or eyeliner, you can change the shape of the eye.

Some women do not know how to use eyeliner, thus depriving themselves of a very practical and effective makeup. The fact is that eyeliners can be of different types. Soft and plastic are designed for shading, they do not hold the line and are not suitable for a clear outline. Dense and less greasy are used for neat thin lines and can replace eyeliner, they draw arrows of different types and sizes.
In addition, you can paint your eyes with a pencil like shadows and use it as a “substrate” to create smokey-aes.
No one can get a beautiful arrow line right away. It is especially difficult to make them symmetrical, that is, draw the same arrows in length and width on each eye.
Important! Observe the shelf life of cosmetics for the eyes. Old cosmetics contain a lot of microorganisms, which can cause conjunctivitis and many other diseases of the organs of vision.
Most women are firmly convinced that they know very well how to use mascara properly, as more often than not, this is the first decorative cosmetics tool that a girl begins to use in her life.
However, most of us unconsciously spoil our mascara, making piston-like movements back and forth, trying to draw mascara onto a brush. This is fundamentally the wrong action, accelerating spoilage of the product. With such movements, air is pumped into the tube, which contributes to the oxidation of the carcass and the entry of harmful microorganisms into it. The product may deteriorate, and eyes with such mascara may become very inflamed.
In order to make the look more expressive and the eyelashes longer, we color our eyes with zigzag movements, bringing the brush to the very base of the eyelashes. Thus, we paint them over the entire length, separate them and lengthen, covering with a thin and uniform layer of carcass without lumps and gluing.
Mascara is a perishable product, its life span usually does not exceed 3 months, so you should not try in vain to "reanimate" dried or thickened mascara. She still will not lie down well and evenly, or she will crumble under her eyes a couple of hours after application. Such mascara should be thrown away and get fresh. You need to buy only the copy that is "sealed" in cellophane and has a sticker indicating the date of manufacture. Expired mascara is a collection of bacteria and fungi that can lead to serious eye diseases.

A simple step-by-step instruction will help women learn the basics of eye makeup, and then use their knowledge to complete more complex options. This method will clearly show how you can color your eyes in stages and will help you easily remember the sequence of actions.
On our site you can find many phased photos of creating eye makeup or watch special videos. These lessons will help you learn the procedure and exactly repeat them in your makeup.
Many makeup gurus recommend painting eyes first. This is due to the fact that during the application, shadows and other products of decorative cosmetics can crumble, staining the area under the eyes. If you apply foundation and powder to your face, removing traces of shadows and mascara, you can lubricate the makeup layer and spoil the whole work. If the eyes are made up before applying the tone and powder, it will be possible to carefully remove traces of paint, apply a foundation or BB cream, powder and mask the traces of bruises and swelling under the eyes with a concealer. As a result of this technique, you can get a perfect, perfectly executed and very neat eye makeup.
For eye makeup for every day, women with large eyes just need to draw a line of eyelash growth with eyeliner or pencil, and cover the eyelashes with mascara.
If you want to put on makeup more expressively, you can use this scheme:
Important! Keep eye makeup in closed boxes away from sunlight, in a cool place. Wash brushes and applicators more often, wipe packages and wash cosmetic bags. This will help not only to maintain a presentable appearance of cosmetics, but also protect against the propagation of pathogenic microflora.
Smoky eye makeup never goes out of fashion, only the shades of shadows and the degree of color intensity change. Most often, classic smokey-aes are made on a substrate of shadows to give the desired density to the color. A good way to make a shadow from a pencil is to take a pencil with a soft plastic texture, apply it on the upper eyelid, then gently blend it with a soft brush.
You can use a pencil instead of eye shadow, creamy eye shadow, or apply ordinary dry eye shadow on top of a pencil or cream eye shadow to add a touch of depth and velvety. To do this, with a fluffy brush, shadows are applied in layers to the upper eyelid, drawing its shape and contours.
To get a beautiful haze around the eyes, the shadows need to blend well. For these purposes, use a lush brush with neutral bright shadows typed on it, which gently pass along the contour of dark shadows.
You can simply complete the mascara makeup on the eyelashes or apply eyeliner, make an arrow, and for a “big way out”, stick artificial eyelashes for greater expressiveness.
It is easy to turn everyday make-up or smokey ice into evening make-up with the help of brilliant and sparkling eyeshadows and “metallic” eyeliner. You can apply them over the entire eyelid or use them fragmentarily, for example, apply shiny shadows or glitter only to the center of the upper eyelid. This technique will make the eyes more convex and expressive.
The line of brilliant eyeliner looks impressive and at the same time more modest than too sparkling shadows. It can be combined with a regular black eyeliner by performing very expressive double arrows.
First, the arrow is carefully drawn with a black eyeliner or pencil. Then, when she “grasps”, just above her, a line of bright colored or shiny metallized eyeliner is drawn along her upper contour. Such makeup is perfectly complemented by lush false eyelashes.
A significant part of women have “fat” eyelids, on which no, even the most expensive and high-quality cosmetics hold. After several hours of wearing makeup, it “floats” and loses its clear shape. To prevent this from happening, you need to use a special base for eyelid makeup.
This tool is simply applied with a thin layer on the skin of the upper eyelid and allows you to gain a foothold. Against this background, any shadows will look more vibrant and juicy, perfectly stewed and worn up to two times longer than without a base.
For lack of a base, you can use non-greasy cream shadows that need to be slightly powdered, or a soft eyeliner that needs to be well shaded. For light shadows it’s good to use a white pencil, and for bright and dark black pencil is suitable. He will make the shadows more saturated and expressive, give them depth and juiciness.
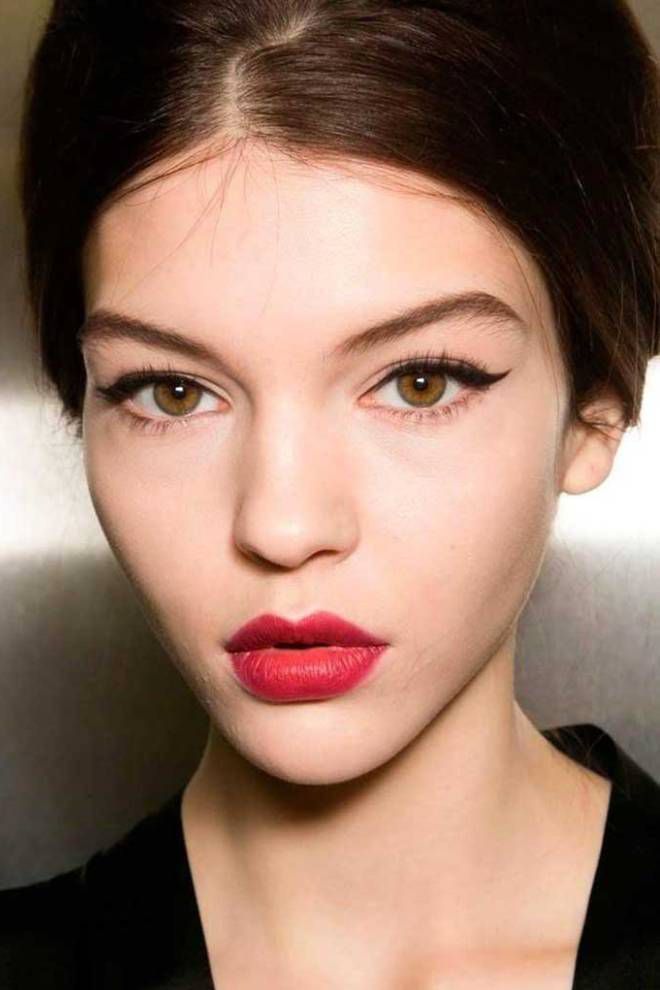
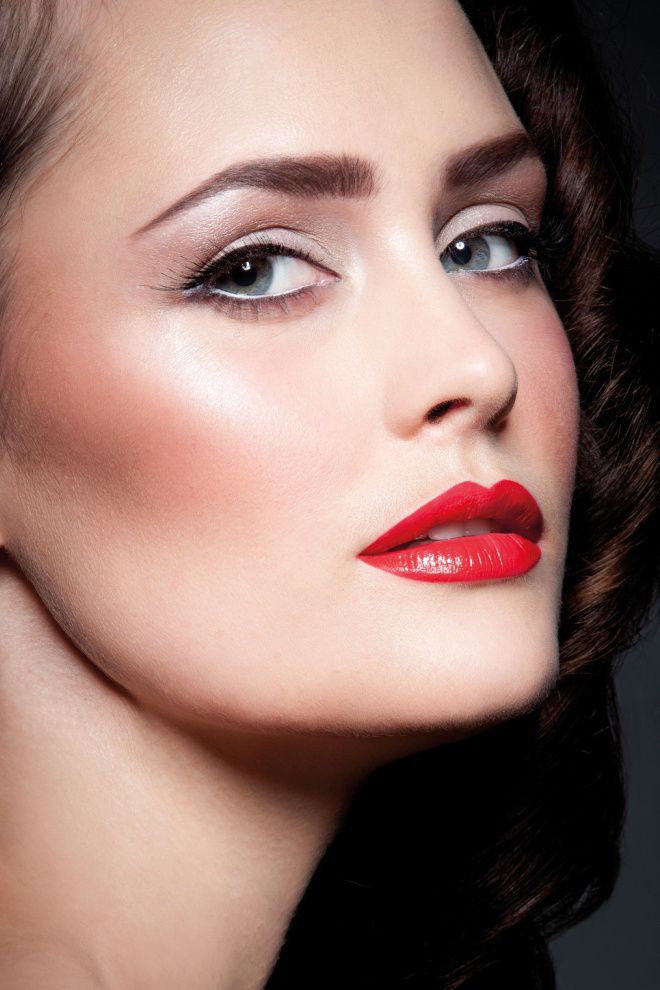
The correct use of decorative cosmetics for the eyes can make the female face more expressive and brighter, emphasizing its originality and beauty. When performing bright eye makeup, you need to remember that in order not to look vulgar, you need to focus on only one accent. If these are eyes, then lips should either not be allocated at all, or use a neutral shine or lipstick.
Eye makeup helps to give the appearance a certain chic and sophistication, but this will only happen if the makeup is done flawlessly accurately. Careless shading, smeared shadows, uneven eyeliner and mascara lying on lumps over the eyelids and crumbling under the eyes will quickly nullify all efforts and make sloppy even a very beautiful woman by nature.
With the help of makeup, you can work wonders of transformation, creating different images. The site Koshechka.ru will share secrets about. Observing these simple rules, you can apply cosmetics in such a way as to emphasize the dignity of the face and hide minor imperfections.
Before applying makeup, you should prepare your face, cleanse and moisturize. To do this, use lotions, tonics and creams suitable for your skin. When the cream is absorbed, pat your face with a napkin so that its remnants are removed. Under the eyes, use a concealer with a special texture that will help hide dark circles and moisturize delicate skin.
It’s not enough to master the make up technique and know how to learn how to paint properly - you need to choose the right makeup products. Use only persistent high-quality cosmetics that will lie on your face flawlessly all day. To create a masterpiece, prepare a large mirror, a set of brushes and a tonal foundation, mascara, a palette of eyeshadow, blush, eyeliner and eyebrow pencil, lipstick and gloss.
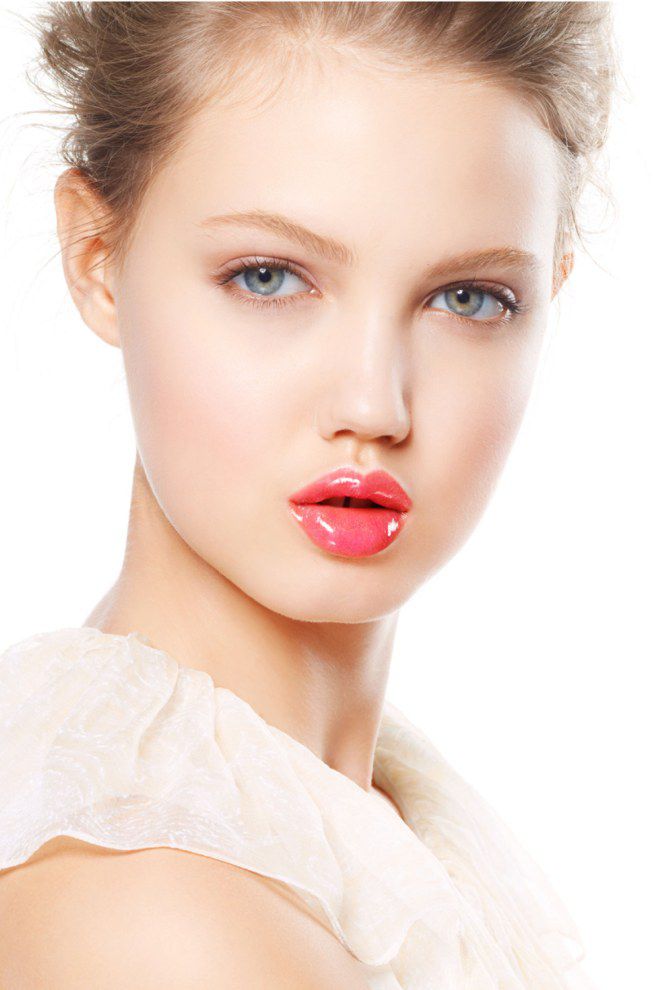
First of all, you should decide on your palette of shades. Existing color typing rules state that fair-haired should choose gentle, cool pastels. Brunettes are better off choosing rich, warm tones. To give the look brightness and expressiveness, use eye shadow for contrasting shades. Otherwise, the effect will be blurry and blurry.
The science of how to learn how to paint correctly begins with the application of a foundation or cream. In color, it should be close to the natural color of your skin. If there are any defects on the face (small pimples, redness), then use the corrector. It is applied pointwise and shaded with a special brush.
The foundation of good makeup is the perfect tone!
The next step is eye makeup. Depending on the style in which make up will be performed, the color scheme of eyeshadow is selected. To understand how to learn to paint beautifully, try experimenting by making several different makeup options on the sample. If you use eyeliner, first make it, and then apply shadows. This will help to hide possible irregularities and slightly muffle the contrast between the eyelashes and the paint, making them visually one.
We pass to the shadows. To get started, apply a light base shade under the eyebrows and inner edges of the eyes. Use the shadows of milky or beige colors, which will help to visually increase the distance between the eyes, raise the eyebrows and make your eyes open. Then cover the fold of the eyelid with the main tone and blend - no clear lines should remain. As for the eyeliner, use the shades of the main tone for it, which are applied with light strokes using the applicator.
To learn how to color your eyes, you need to shade the shadows so that the color transition is gradual!
Before applying the mascara, use curling irons to make your eyelashes slightly bent. Then cover with a shimmer base that protects them, will help to better apply the mascara and facilitate the make-up removal process. .
Of great importance is the quality of the carcass: it should not be too liquid, crumble, go to bed in lumps. First, mascara is applied to the ends of the eyelashes, after - along the entire length. Choose a color slightly darker than eyelashes, but for evening make up you can use and.
How to learn to beautifully apply lipstick? First of all, cover the surface of the lips with a protective moisturizing balm. To keep the lipstick longer, you can powder them a little. Circle the contours with a pencil, giving the desired shape. This should be done not with a solid clear line, but with light strokes. Next, apply lipstick, get wet with a napkin and make another layer. In order to visually make the lips more puffy, use the gloss. Choose a lipstick depending on how brightly you decide to highlight your eyes, but remember that dark colors make lips smaller and light colors - vice versa.
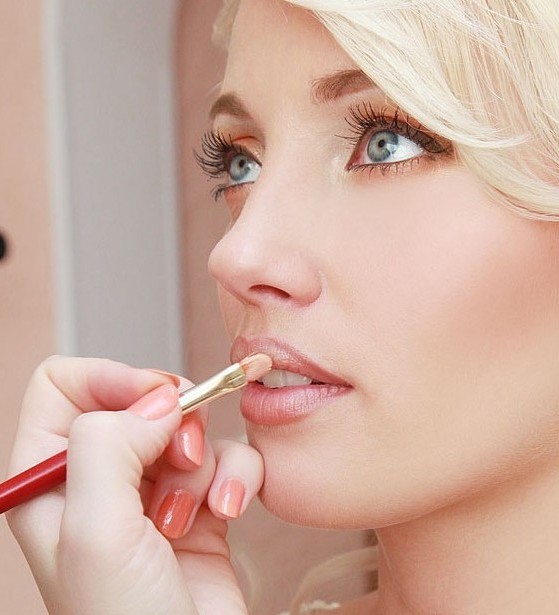
To learn how to color lips, you must first prepare them - for example, powder
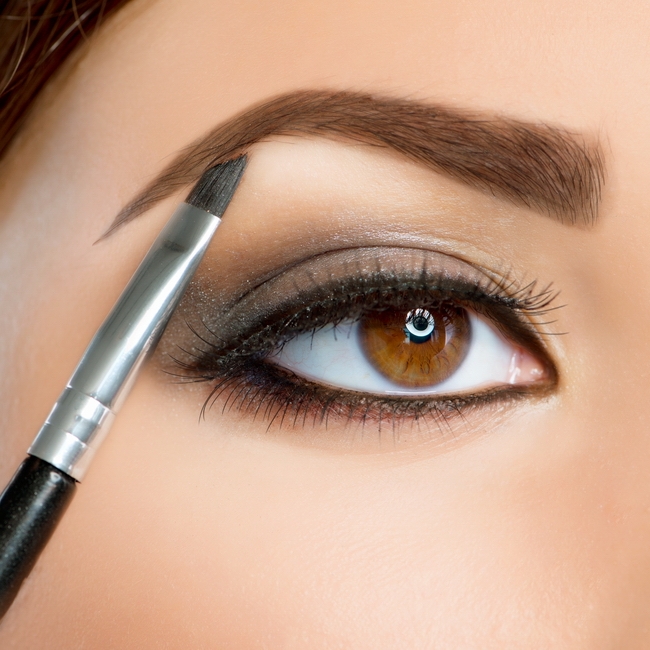
Comb your eyebrows with a thick brush and cover with a shimmer. When it is almost dry, use the soft eyebrow pencil to give the desired shape. Do not use too dark tones for this, especially if you are blonde. Eyebrows should serve as a frame for the eyes, and not be the main focus of makeup.
Take advantage of blush and emphasize the fresh colors of your face, adjust its shape. To learn how to learn to properly paint with blush, puff out your cheeks and you will see bulges. This will be the main place where they should be applied. Blend to make them look natural. The blush added to the tip of the nose, middle of the forehead and chin will help to narrow the wide face visually.
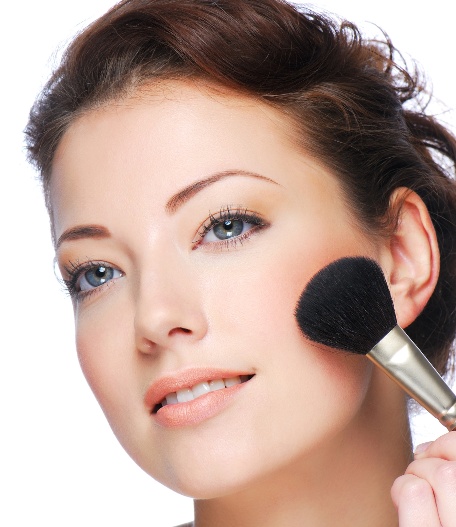
Blend the blush with a large soft brush
Now again, gently walk over your face with a wide soft brush to remove excess makeup. The most important rule in wisdom ideally is to show a sense of proportion. Too catchy bright colors on the face will look vulgar. This is especially true for daytime makeup. Look carefully at yourself in the mirror and decide if you are happy with the result.
Manicure gives a perfect look to the nails and adorns every girl. Therefore, it is important to make it neat and correct. At first glance, everything seems simple and easy, but it is not.
Roughly painted nails can spoil the impression of a girl. Compliance with special rules of manicure will help to avoid such unpleasant situations.
High-quality manicure will decorate any girl
In order to understand how to beautifully paint your nails yourself, you need to figure out step by step how to start a manicure and what rules to adhere to.
Stages of preparation:
It's important to know! Constant cutting of the corners of the nails leads to their delamination and weakening.
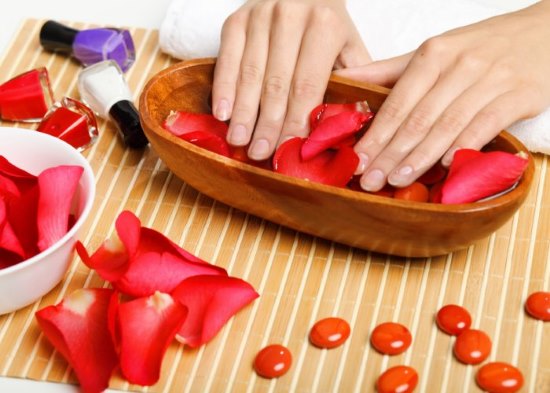 You can add a few rose petals to the steaming bath - this will add a touch of aromatherapy to the process
 Consider the process in more detail:
Beautiful nails are unattainable without the right and thoughtful selection of varnish.
To make the layer neat and even, the varnish, according to the rules, should be liquid, and not thick.
This can be checked in a simple way: hold the brush vertically above the bottle of varnish. If after 3 seconds on the brush there will already be a drop and after this time it will fall, then this varnish is high-quality and it can be used.
Note! The varnish should not quickly drain off the brush. Too liquid varnish is a diluted varnish that is improperly made.
A good varnish cannot have a strong odor of acetone.
In the paint brush, according to the rules, the villi should be round in shape, not sticking out to the sides. The evenness of the layer depends on the brush.. Therefore, it is necessary that it be medium in stiffness.
Light-skinned and light-red shades are good for girls with fair skin.
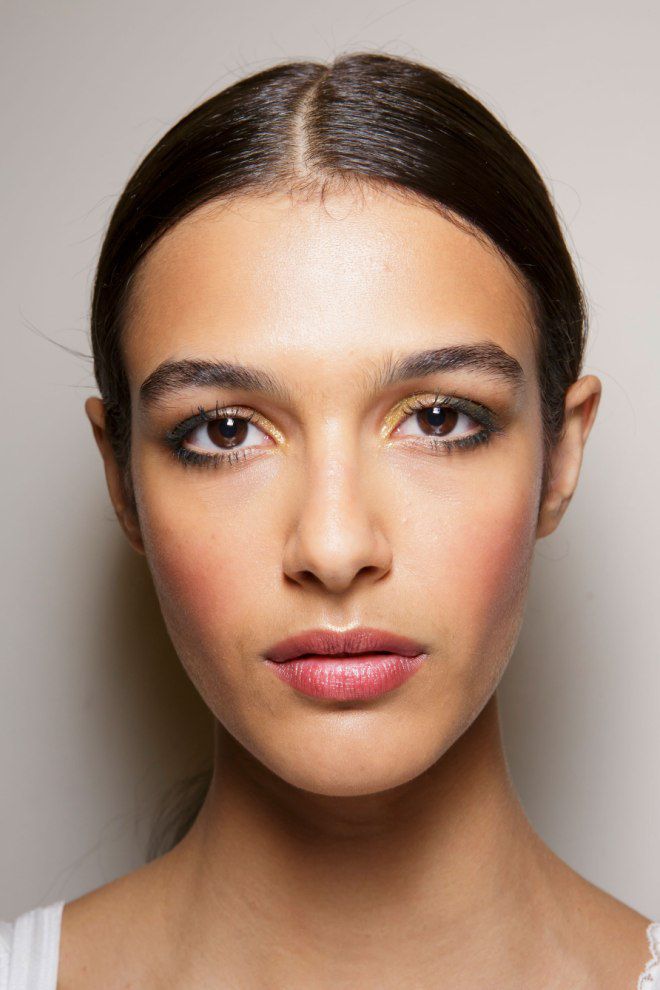
Girls with a dark skin color are recommended a golden color of varnish, and almost all bright shades.
You can also choose the color of the varnish to the color of your lipstick.
However, a complete copying of the color of the varnish to the color of the lipstick is considered bad form and is unacceptable to use when trying to paint nails not only beautifully, but also fashionably.
Now we’ll figure out how to properly and beautifully paint your nails with varnish.
Take a protective varnish base and paint them with one layer of nails. In doing so, place your hand comfortably on a pillow covered with a towel.
First of all, varnish is applied to the little finger. Swipe the brush in the center of the nail, from the nail roller to the very end of the nail, then paint the nail on the sides.
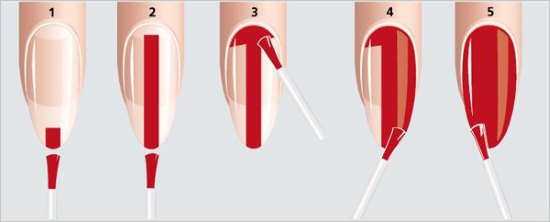 Scheme: one of the options for properly painting nails
 Excess varnish can be removed with another clean brush. So make up all the nails on the hand. Do not forget to soak a brush in the varnish before staining each nail. After covering with a protective layer of all the nails on the hand, wait until they dry. Then start painting the nails on the second hand.
As soon as the colorless varnish dries on all nails, proceed with the application of decorative varnish. If the initial layer is uneven, then when it dries, apply a second layer.
There are varnishes that dry quickly enough. However, if the nails are varnished in two layers, then it will take more time to dry. In order not to waste time in vain, you can dip your nails in a bath of cold water.
When you yourself are trying to beautifully paint your nails at home, often, through negligence, the varnish gets on the skin around the nail. Consider several methods that will help remove excess polish, and at the same time not spoil the manicure.
Excess varnish must be cleaned carefully., and only after the nail polish has dried, so as not to erase the manicure:
Try to paint your nails slowly and gently initially, so that later you do not have to remove excess varnish.
French manicure is always popular.
French looks great on nails of any shape and length.
It is also considered acceptable and universal for any of the options for this manicure, suitable for all dresses and special occasions.
Therefore, most of the fair sex prefer French manicure.
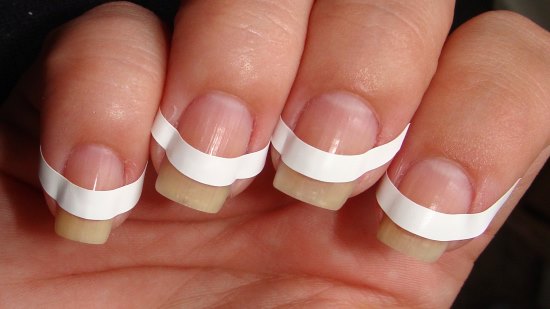 To create a franchise, you can use special stencils
 To create a French manicure in a home dyeing environment, and it looked beautiful, as if superimposed in a salon, you should be well prepared.
What tools do you need:
Step-by-step instruction:
So we examined in stages how to make a beautiful French manicure on your own, and how to properly paint your nails for him.
Tools for painting on nails are divided into two types:
Professional ones include:
Home tools include:
If you decide to do nail painting yourself at home, then you will need the above tools, varnishes of different colors, acrylic paints and decorative elements.
It's important to know! To paint on nails, you need to choose a well-lit place to work.
Rules to be observed:
Do not be discouraged if the first time you do not work out very carefully. With each new pattern you will get better. Therefore, for beginners, it is advisable to select simple drawings for the first time.
The manicure with scotch tape is original and uncomplicated. Even beginners quickly learn it.
You will need:
How to do:
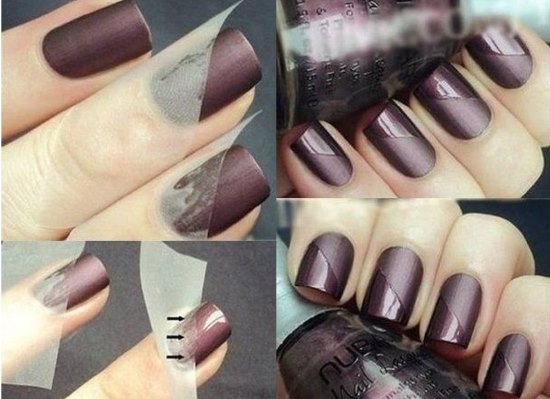
As you can see, everything is simple. Using tape, you can make up and create a beautiful picture on your nails.
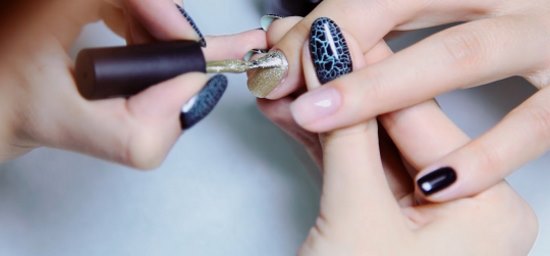
Craquelure - translated from French means “crack”. This type of manicure belongs to the vintage style.. Due to its originality and unusualness, it has become very popular. There are even special craquelure varnishes, after drying of which so-called cracks appear on the nails.
Lucky is divided into two types:
What rules should be followed when creating a craquelure:
First, do a classic manicure. Then apply a basic coating on the nails, after it dries, paint the nails with the selected varnish. As the varnish dries, apply craquelure. And at the end, cover the nails with a fixative.
 The process of creating a manicure with craquelure effect
 Subject to all the above rules, you will be able to make a nail craquelure at home. To create it, you just need to paint over the treated nails with a special varnish, and a beautiful manicure is guaranteed to you.
Many girls who do manicures for themselves at home find the fixer useless and unnecessary. Perhaps these girls simply never used the topcoat, or used plain transparent varnish instead.
However, a high-quality top coating has several advantages:
There are many types of topcoats from different manufacturers. These are transparent, decorative, matte tops. In addition, today you can find the top and topcoat in one bottle, which is much more convenient and economical.
There are many different prohibitions for pregnant women. Sometimes they are so strict and adamant that, having heard them, you can begin to be afraid to just live. However, do not run your nails during pregnancy.
For most women, during this period, nails deteriorate from calcium deficiency, so the question often arises: is it allowed to paint nails with varnish during pregnancy.
To apply nail polish, of course, you can, you just need to adhere to some rules:
Being pregnant is happiness. And if you really wanted to paint your nails, then do not deny yourself this little joy.
In this video, you can learn about one of the ways how to paint your nails at home quickly and accurately:
In this video, you can find two neat ways to apply nail polish:
In this video you can learn about how to beautifully paint your nails with a sponge:
It is important for every woman to maintain a well-groomed appearance and attractiveness. Of particular importance is makeup, which is able to hide all the imperfections on the face and give the image a fresh and neat look. Only here, not every woman knows how to paint, and hence the unwillingness to start this business altogether. Some cannot go outside without makeup, while others remain gray mice, having no idea what shadows, lipsticks and creams are. Stop living like this, let's learn to do the right makeup together.
In fact, there is nothing complicated. Do not believe if you are told that only professionals do good makeup. You yourself can do everything. And what you need for this, now find out.
Stage 1: preparing the face
Wash your face and apply a nourishing cream on it. Wait until the cream is well absorbed, and only then proceed to the next step.
Stage 2: create the foundation
If your face has acne, blackheads, bruises under the eyes, then you can skillfully mask them with a special corrector. As a result, your face will get a well-groomed and neat look, as if it had always been like that.
Now apply the foundation. Remember that it should not differ from the color of your face or be only a tone lighter. To apply the tonal use sponge. Do not overdo it, the foundation is applied in a thin layer, otherwise your face will look artificial.
Stage 3: apply powder and blush
Since you are just learning how to paint correctly, you can completely do without these funds, a foundation will be quite enough. And yet, powder and blush are an important component of beautiful makeup. The powder is applied with a brush. By the way, loose powder is the best. With blush, be careful not to spoil everything, apply them lightly on the cheekbones. This will help you adjust your face shape and make your makeup more expressive.
Stage 3: paint the eyes
Now let's see, in pencil. This simple item is able to make eyes more expressive and attractive. A line with a pencil is usually applied in front of the shadows, but some do and vice versa. When buying, be sure to pay attention to the structure of the pencil: it should be soft and not scratch the skin of the eyes. To begin to draw lines, you can practice on a piece of paper. You can draw a line with a pencil in two ways, starting from the inner corner of the eye or from the middle. The closer the line is to the eyebrows, the better. You can use a pencil for both the upper eyelid and the lower one. if you do not succeed all at once, as you can paint correctly only after a few workouts. In general, drawing with a pencil is more difficult than eyeliner: you won’t be able to draw a line without breaking.
Try experimenting with shadows. To make the eyes more expressive, choose light shades. Dark shadows can visually enlarge the eyes, and if you do not need it, then try to avoid them.
Well, finally, we will figure out how to properly color eyelashes. The price of the carcass does not play a special role, since even the most inexpensive can be of high quality. Mascara should be applied from the roots of the eyelashes to the ends. After applying mascara, comb the eyelashes with a special brush, and then wait a minute until they dry. Then you can apply the mascara again until you achieve the desired result. But do not overdo it, it is not necessary that there are too many mascaras - the eyelashes will look clumpy and sloppy. Try to color the side and lower eyelashes, so it will be more attractive. By the way, it is not necessary that the mascara is black. If you have blond hair, then you can also apply brown eyelashes.
Stage 4: paint the lips
To understand how to properly paint, you can not lose sight of the lips. Beautifully made up, they perfectly complement any kind of makeup. Small difficulties arise with the choice of lipstick or gloss color. Do not be afraid to experiment, because only in this way will you be able to find the color that suits you best.
First, draw a pencil around the contours of the lips. It should be a little darker. After that, gently paint your lips with lipstick or gloss.
That's all, the makeup is done!
The female gaze is able to subdue and capture attention from the first seconds. For this reason, most makeup options focus on the eyes. It is important to know how to properly paint them to emphasize the advantages and visually hide the disadvantageous anatomical features.
Stylists advise to pre-equip a cosmetic bag with a basic set, which includes:
Before you make up your eyes, it is recommended to apply a base under the shadows on your eyelids. In this area, many (about 80%) women have oily skin. As a result, cosmetics can crumble, roll into sloppy rollers and collect in folds. The base warns of such problems. Additionally, it prolongs the resistance of visage (up to 16 hours) and enhances the pigmentation of shadows.
The perfect make-up of glossy magazines, made by professionals, can be done independently. Beautiful eye makeup should meet the following rules:
There is a classic scheme on the basis of which most makeup options are made. The standard method for applying eye shadow is shown in the figure. The numbers indicate the degree of brightness of cosmetics:
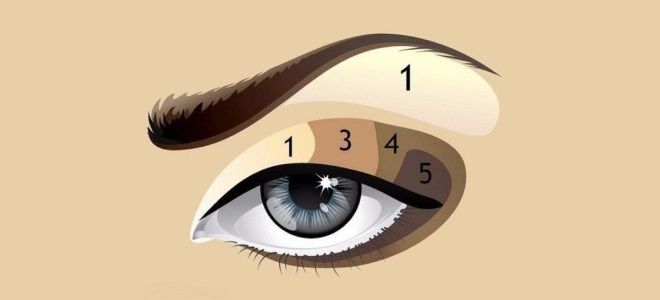
An intermediate tone (2) is obtained by mixing 1 and 3. In the process of thorough shading, a smooth transition from a light to a dark shade is formed. If desired, you can add separately the 2nd color to the scheme, between 1 and 3. The simplified method of applying shadows involves the use of 3 shades - the lightest, medium saturated and dark.
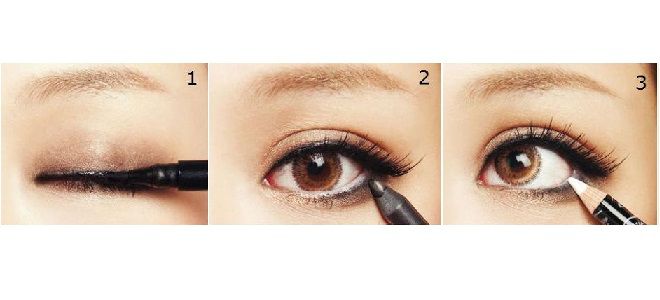
The specified type of cosmetics helps to emphasize the growth line of eyelashes, to make them visually thicker. Using a pencil, the eye section is clearly distinguished, they can beautifully draw arrows and even apply instead of shadows using the feathering technique. This product is available in 2 versions - with retractable and stationary stylus. The first type of pencils is softer, they are more economical to use and shade well. The second type is harder, it must be constantly grind.
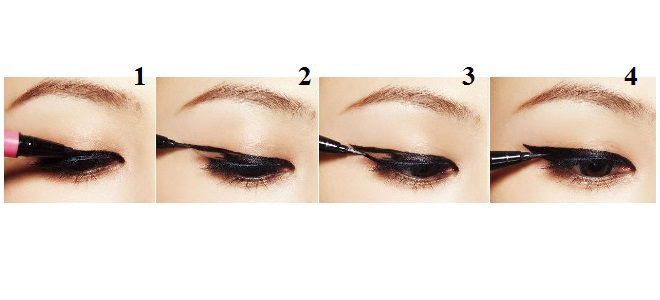
How to apply eyeliner is shown in the diagram below:
The described cosmetic is necessary for drawing clear lines without shading, therefore it is used when creating graphic arrows. Before you apply eyeliner, you need to draw them in shadows. If the products are used in the wrong order, the lines will be faded or blurry. Eyeliners are available in different versions, women individually choose the most convenient types:
Given the features of this product, its bowl is used when drawing arrows. The photo below shows how to beautifully apply eyeliner:
The final stage of makeup is one of the most important. If eyelashes are poorly stained, the entire effect of makeup is lost. In some cases, mascara may be the only cosmetic product in the make-up, for example, beautiful eye makeup for brown large eyes with natural thick and curled eyelashes is sometimes performed without eyeliner and eye shadow. Using the technique recommended by experienced stylists, it’s easy to achieve results with budget cosmetics.
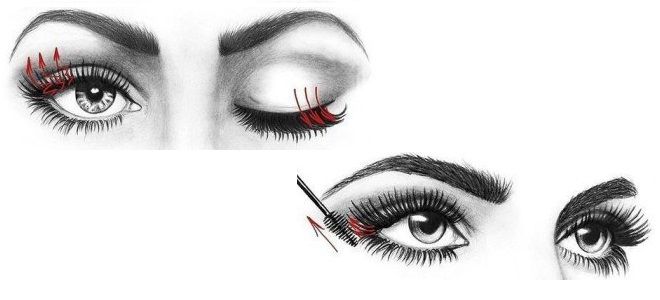
The figure below shows how to apply mascara on eyelashes:
With the help of competent makeup, you can visually smooth out many anatomical defects of the eyelids, including ptosis (drooping) and make the look deep and sensual. Ways to expressively make up eyes depend on their section, size and makeup goals. Any make-up should emphasize the shade of the iris and create a pronounced accent, draw attention to the look.
There are several basic tricks that provide the desired result. Recommendations on how to make-up your eyes so that they seem bigger:
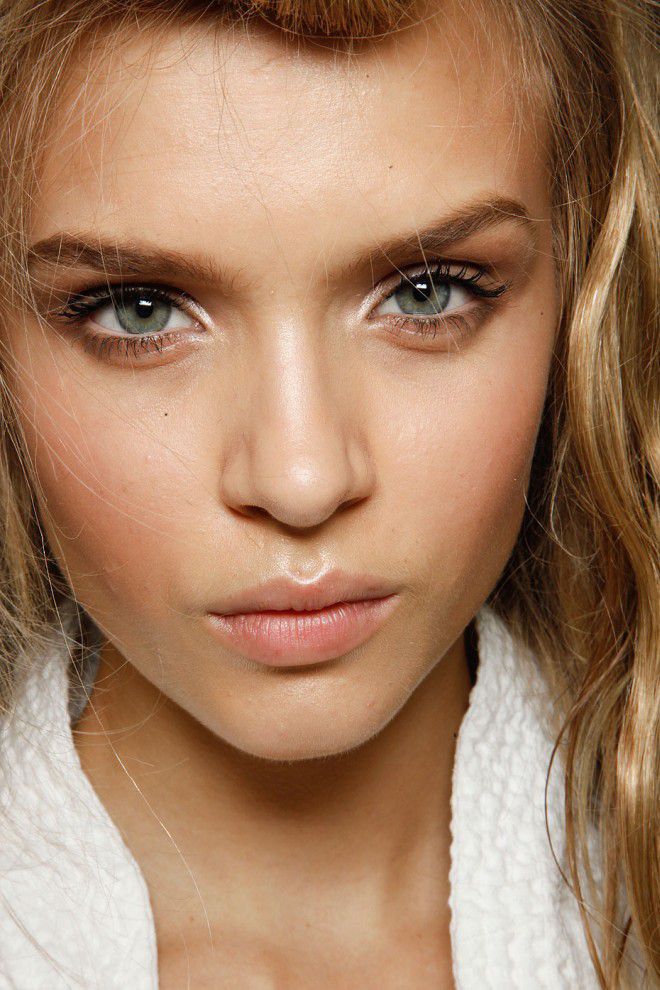
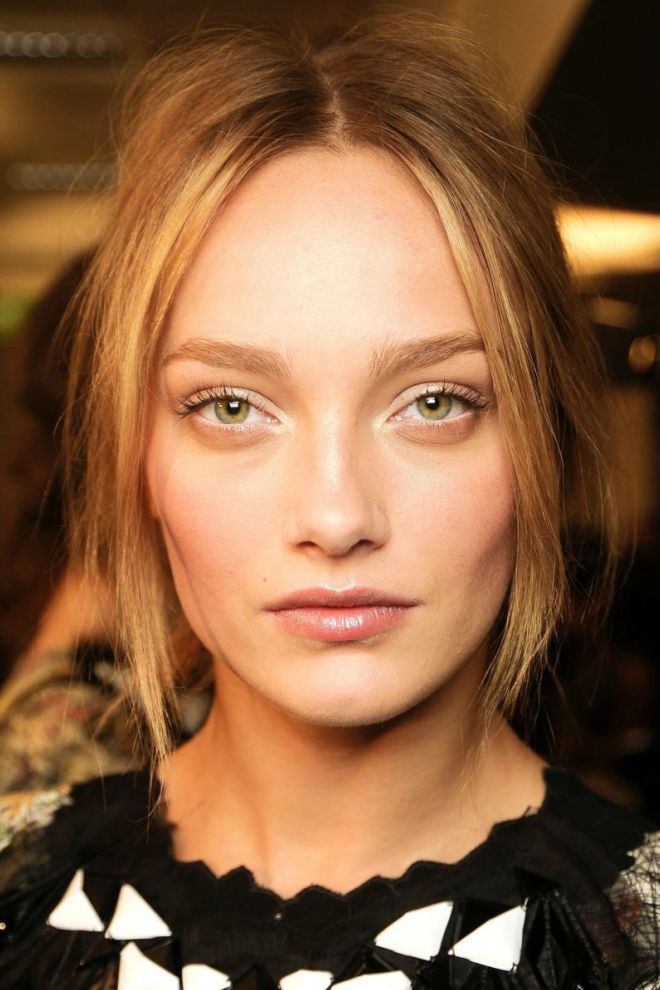
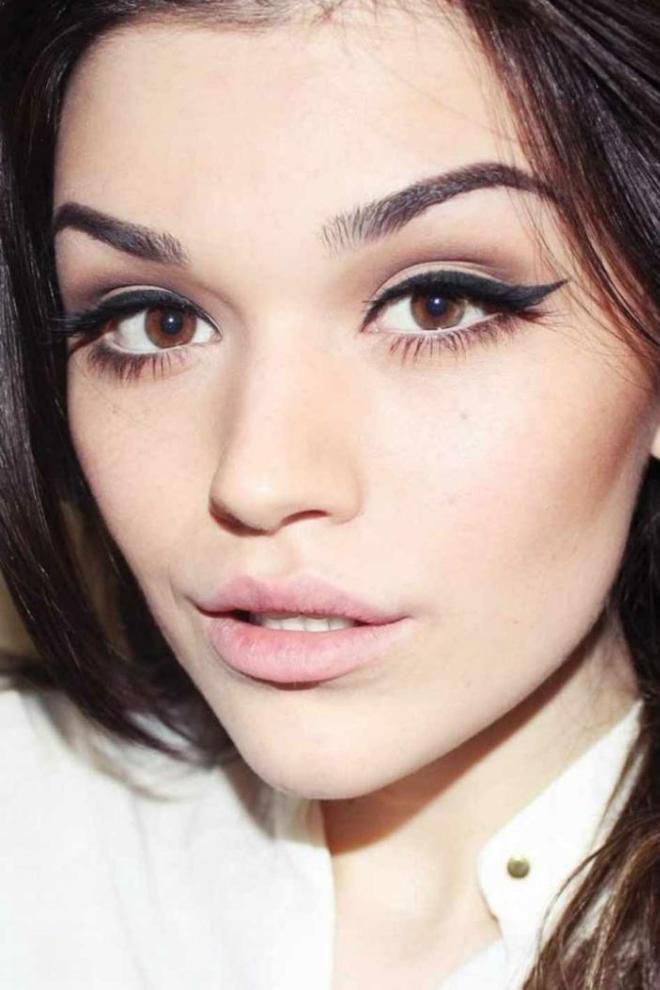
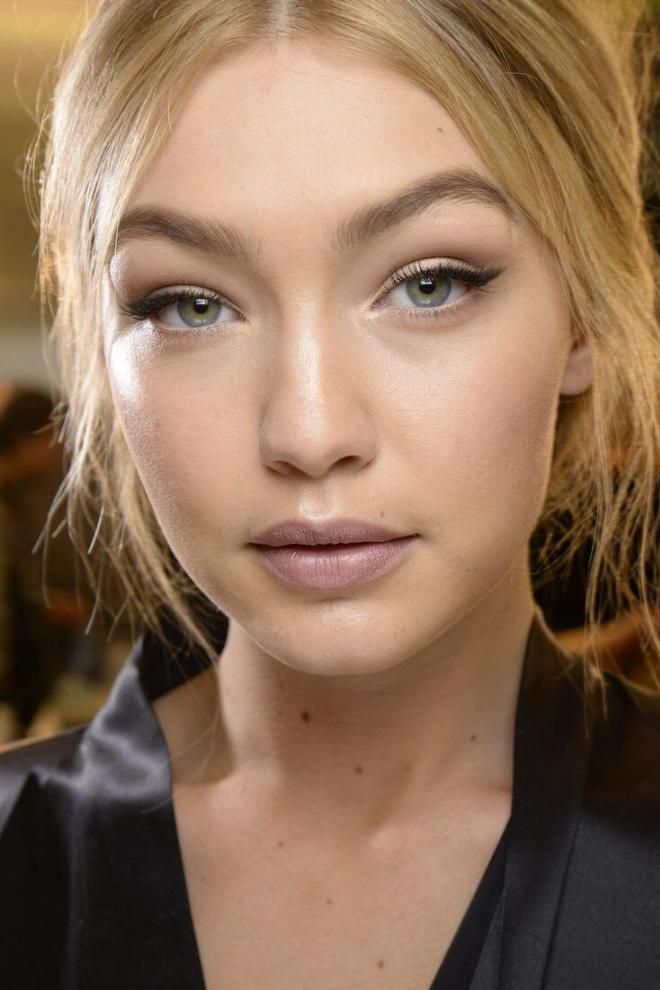
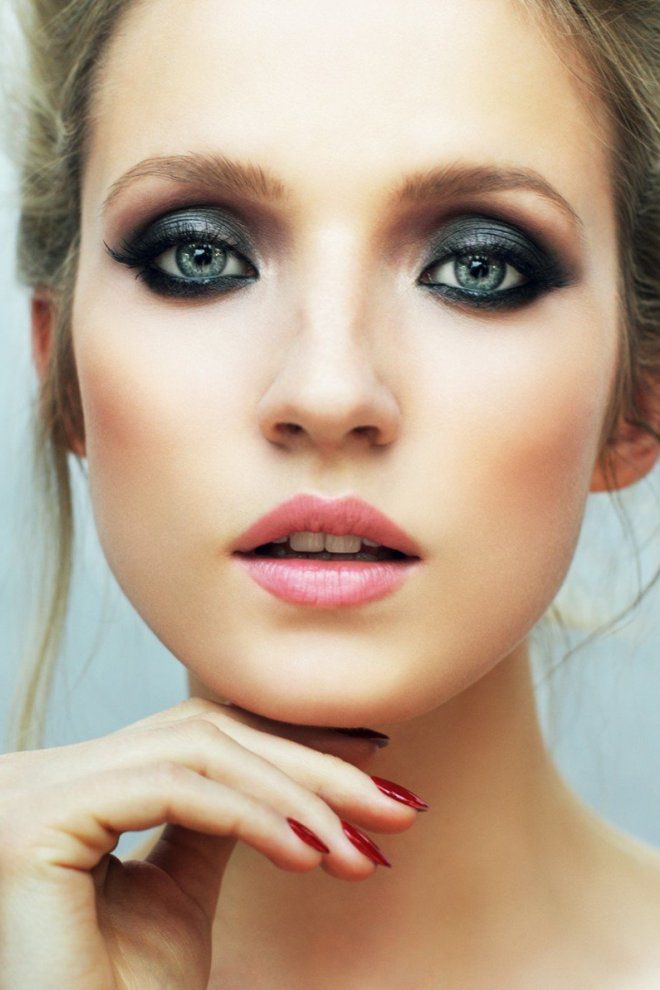
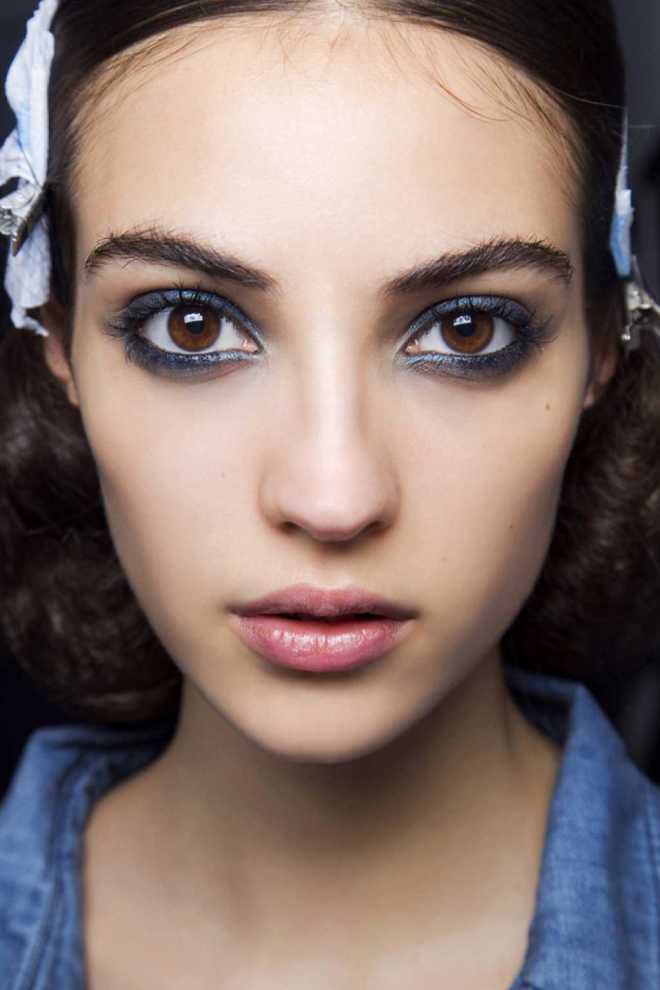
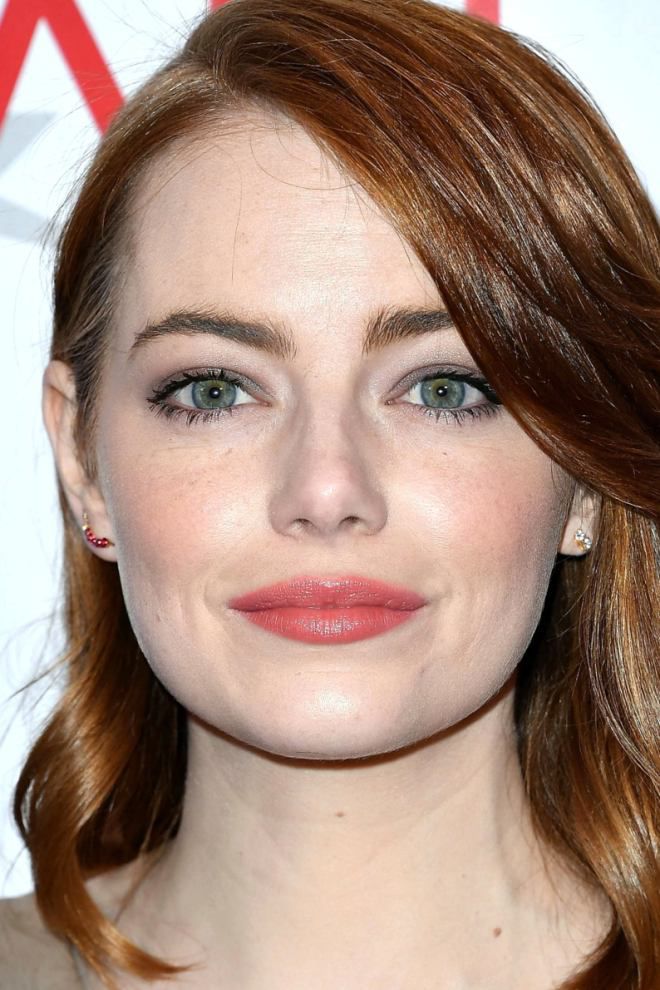
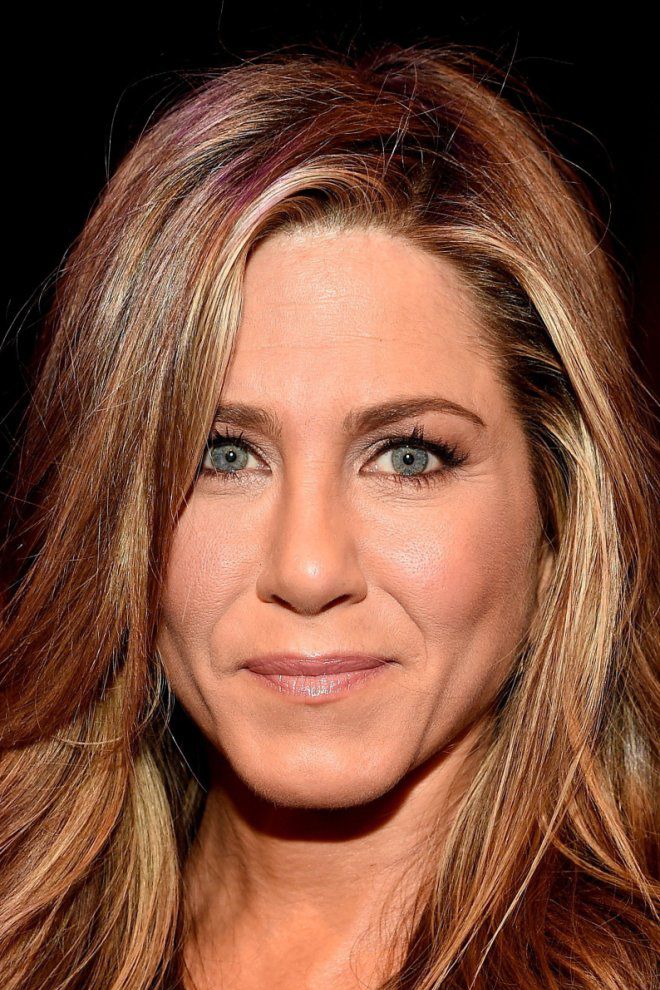
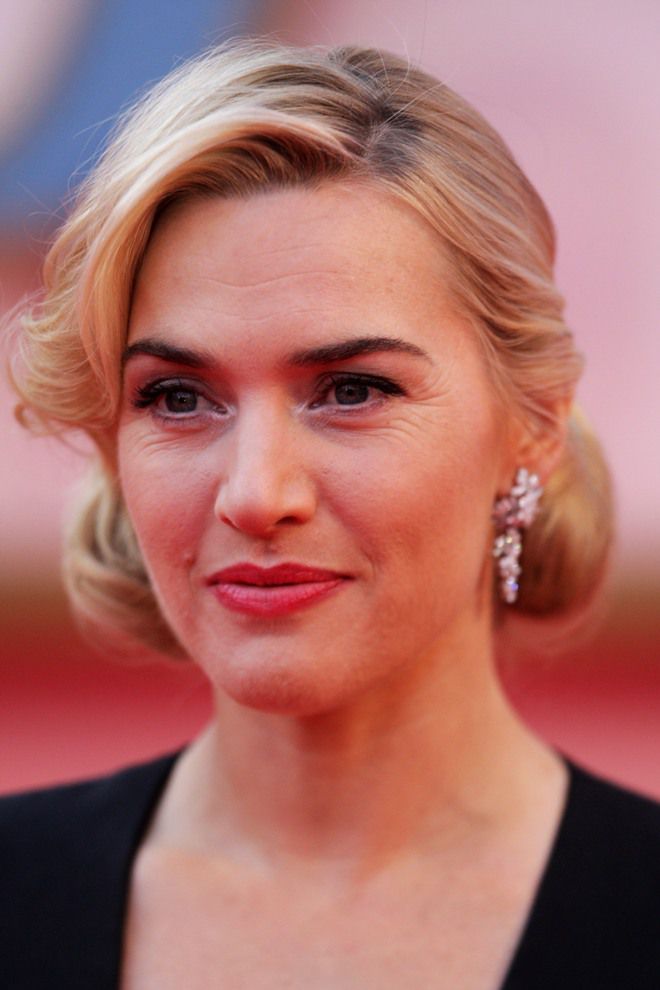
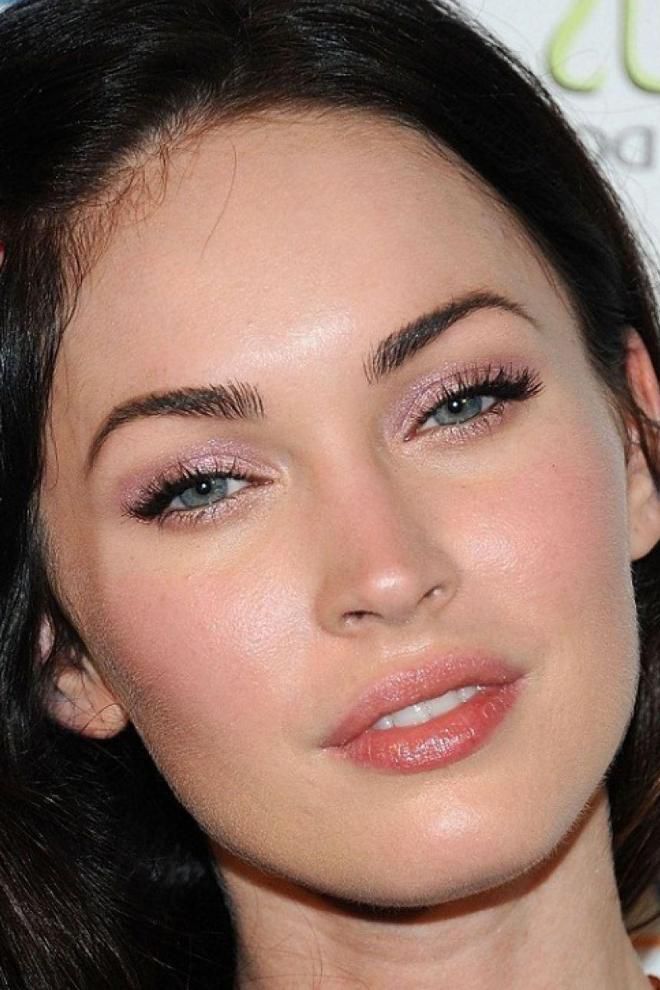
Before you beautifully make up your eyes and make them visually larger, it is better to familiarize yourself with the work of professionals. The photos below show the most successful makeup examples from famous stylists collaborating with Hollywood stars. Most of the options are very simple, they can be repeated at home.
Most women confuse the impending eyelid with this particular look and cause the wrong make-up. It is important to use the correct methods, how you can make up your eyes and visually reduce the depth of their fit, push forward (examples are shown in the photo):
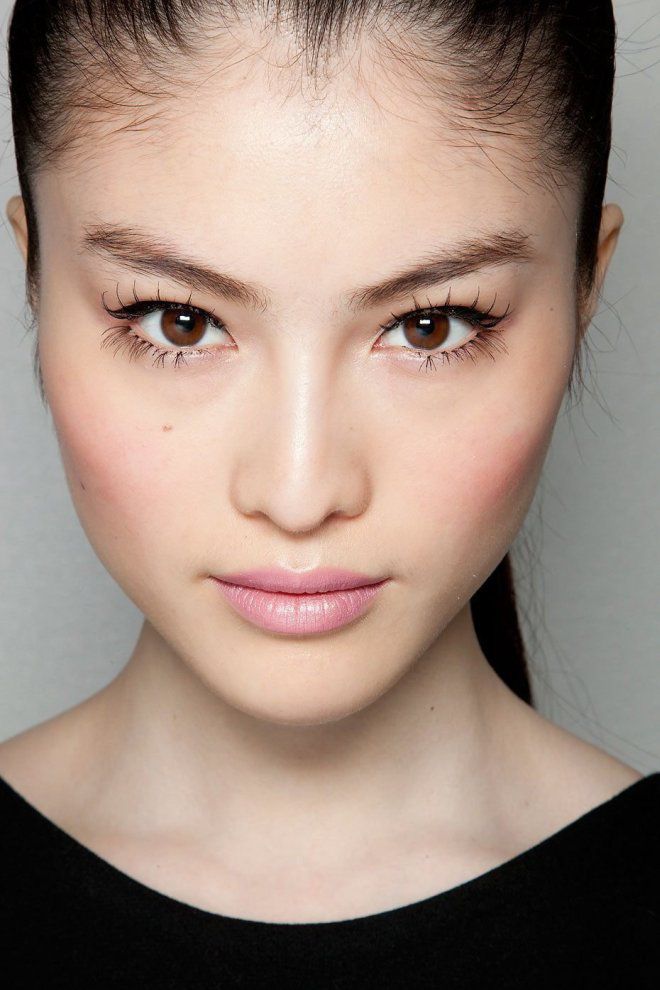
Women with an Asian age tend to visually expand the incision vertically. Beautiful makeup for narrow eyes helps to achieve this goal, but it is important not to overdo it by drawing unnatural lines. Good evening make-up options for the described cases - smokey ice in any shades. This type of make-up visually expands the cut of the eyes, rounds them. Daytime makeup should be less saturated and bright. To create it, the following recommendations should be followed, how to beautifully paint narrow eyes:
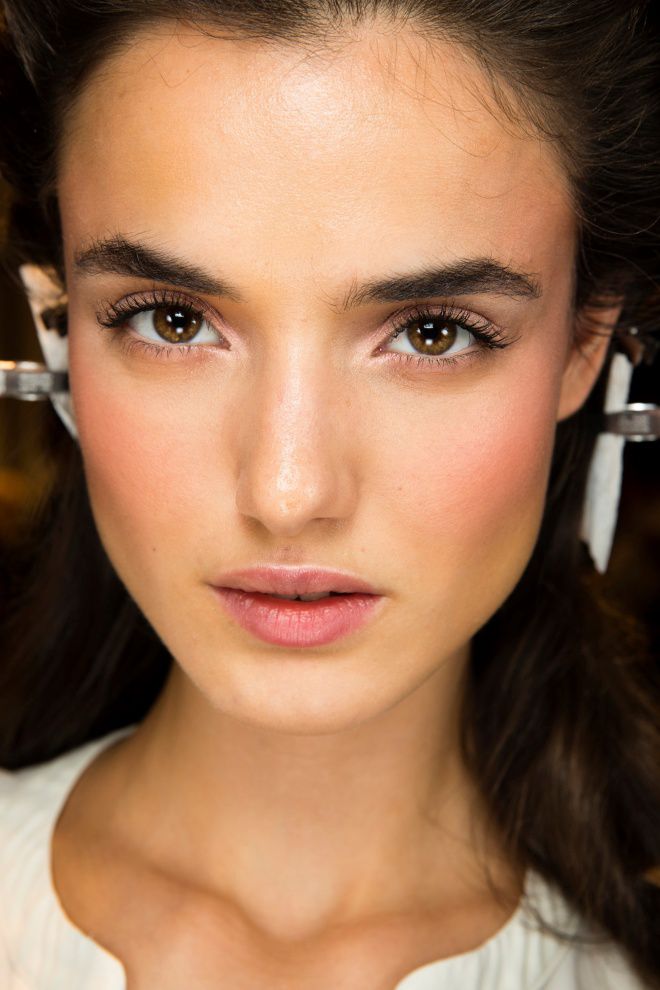
A large section of the eyes does not always look beautiful. Excessively convex and round eyes have to visually make smaller and more proportional. Visage in the situation under consideration is fundamentally the opposite of the previous options. Makeup for large eyes is based on the following principles:
The main task of this makeup is to emphasize and raise the natural fold. With such a feature of the eyelids, standard methods will not work, how to make up arrows on the eyes. In the case of a strong overhang, it is better to completely abandon them, emphasizing the line of eyelash growth with a fine feathering of dark shadows. Some useful tips on how to beautifully brighten your eyes with a “heavy” eyelid:
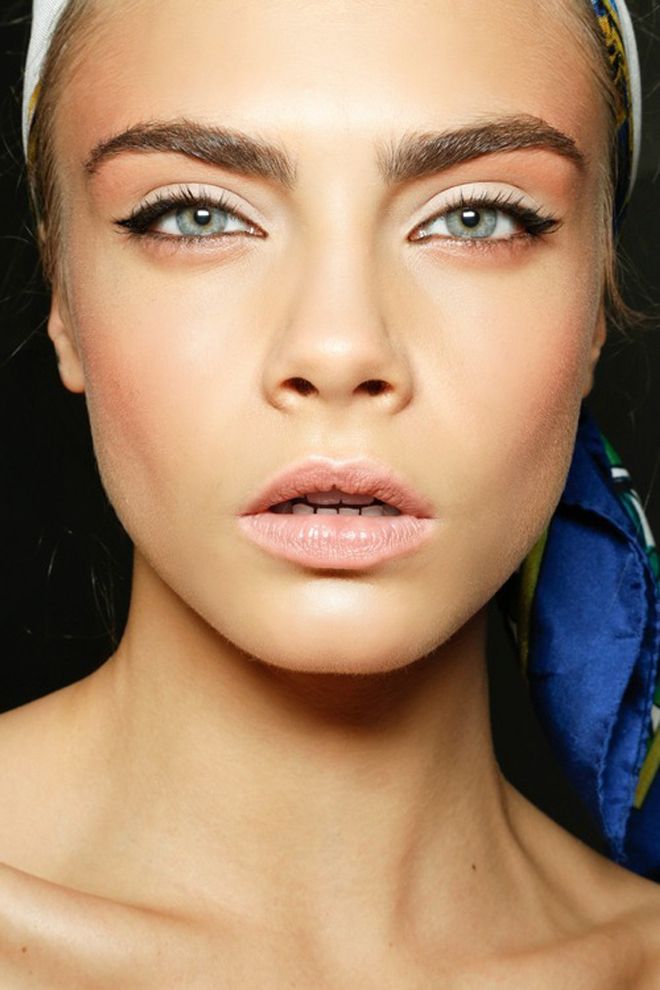
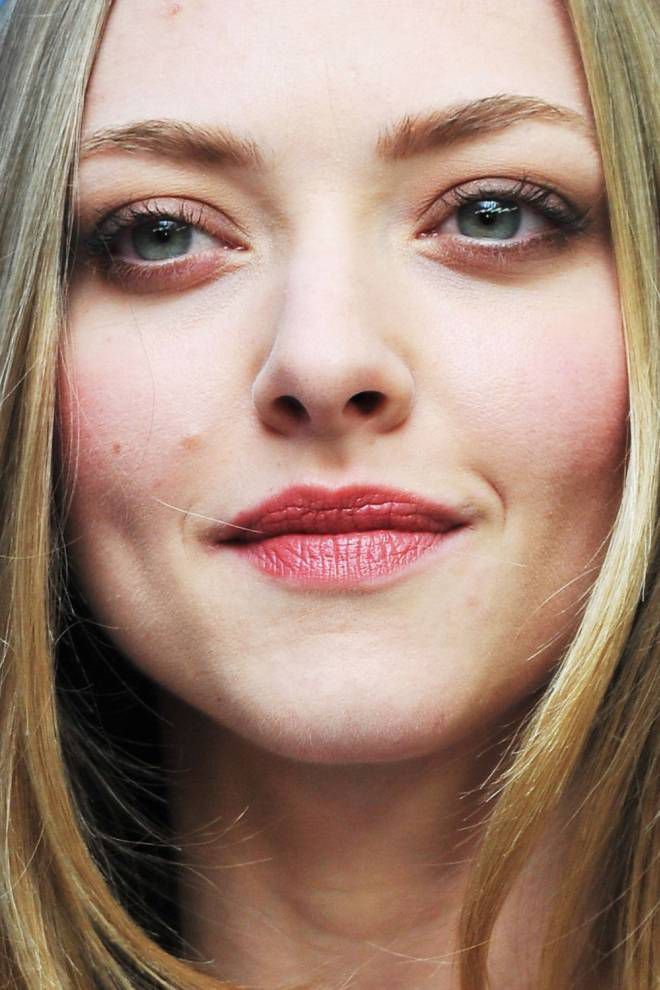
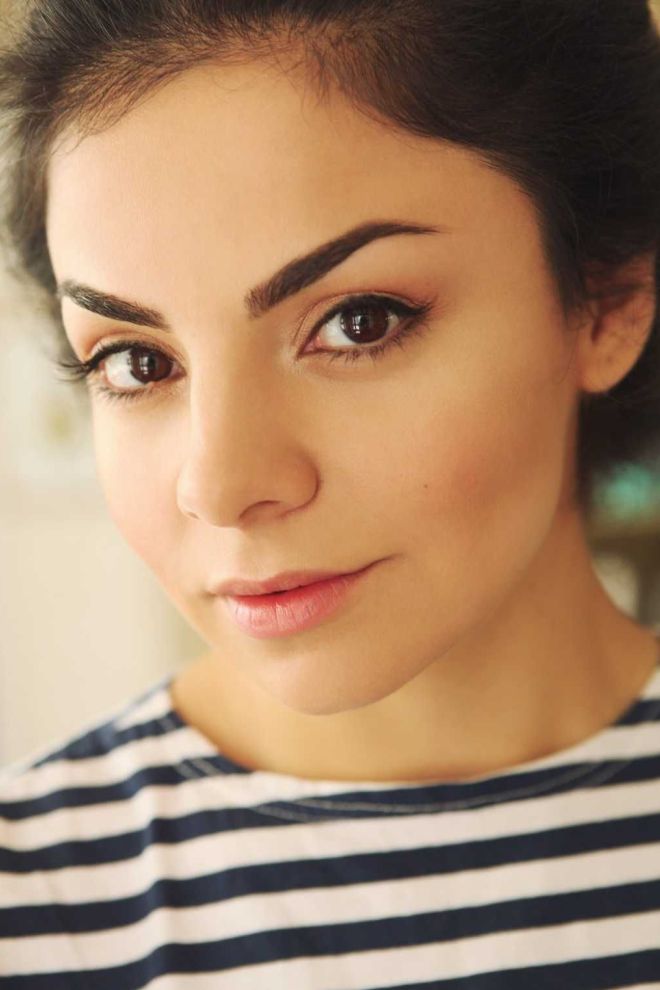
Visage for work, study and other activities should not be too catchy and bright. Everyday eye makeup tends to naturalness, so when it is performed, professionals recommend using a restrained range of cosmetics:

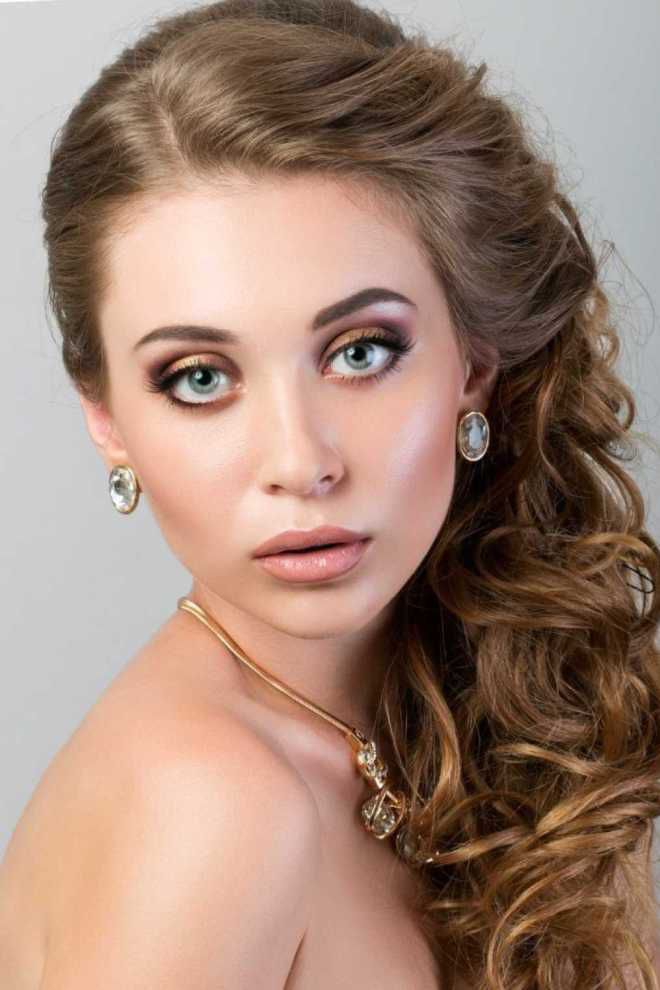
For special cases, a rich and contrasting make-up with a pronounced emphasis on the eyes is required. To emphasize the color of the iris, it is important to choose the right shades: