You probably haven’t summited any Swiss mountains lately, but chances are you’ve powerlifted a preschooler or four bags of groceries . . . or both together! Fortunately for people like us, an herb traditionally used by Swiss mountaineers for muscle soreness also works for non-glamourously acquired bumps, bruises, and muscle aches – Arnica montana.
Sometimes called wolf’s bane or leopard’s bane – arnica is thought to ease discomfort and improve blood flow to the area, which carries with it nutrients needed to support healing and helps to clear away waste.
According to The New York Times, “scientists have found good evidence that it works” – specifically, they mention a couple of studies that found it was as helpful for reducing pain and stiffness.
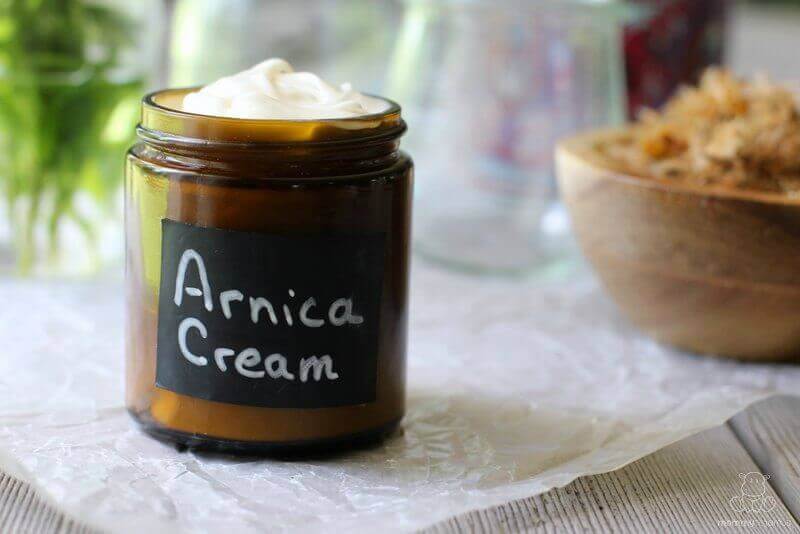
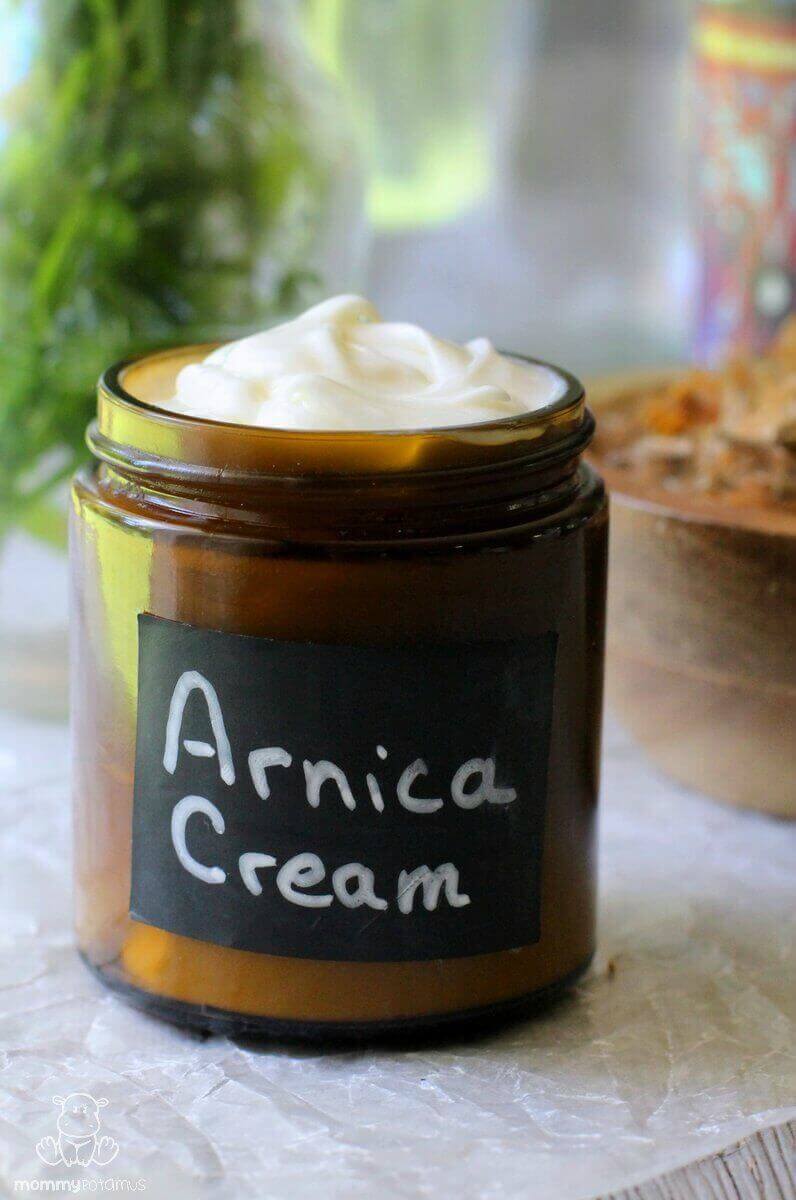
That’s why when I injured my shoulder recently, I made up a batch of arnica cream to use along with physical therapy. It was SO HELPFUL, and so easy to make, too! I’ve included a video tutorial so that you can see for yourself. 🙂
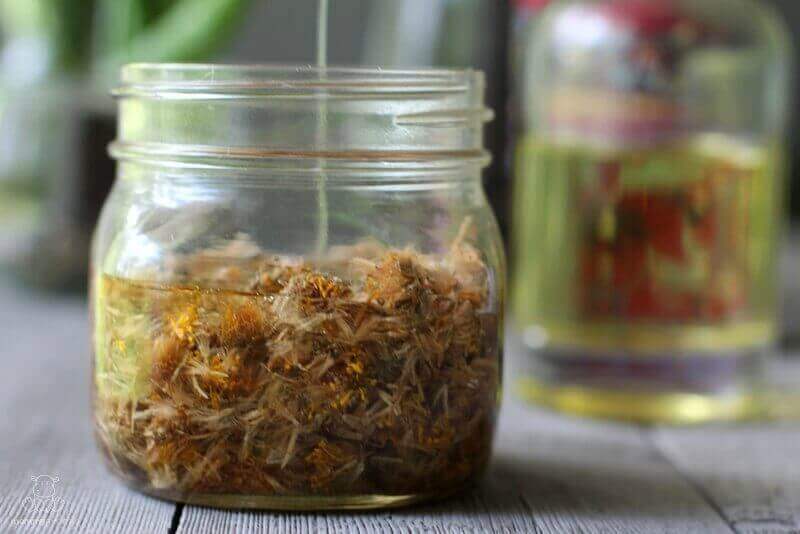
Arnica cream is made from oil that has been infused with the helpful properties of arnica flowers. You can make arnica oil at home using the instructions at the bottom of this page or buy it here – it’s pricey, which is why I prefer to make mine!
Arnica oil is not an essential oil – it’s made by placing whole arnica flowers in a carrier oil such as olive, sweet almond, or apricot to extract the beneficial properties of the flowers. Essential oils only extract the light aromatic compounds in a highly concentrated form. Both can be very useful depending on the circumstances, but for this cream you want whole arnica flowers.
It’s totally up to you. Here are the main pros/cons of both:
* Arnica Oil Pros: No water in the formula means a much longer shelf life. Helpful if you only need a small amount and want to save the rest for later.
* Arnica Oil Cons: Can feel a bit greasy when applied. (Not a huge issue, though. Depending on the oil that is used it can absorb fairly quickly.)
* Arnica Cream Pros: Feels less greasy when applied.
* Arnica Cream Cons: Shelf life is much shorter unless you use a natural preservative.
Arnica oil/cream is meant for use on unbroken skin, and can generally be applied daily for up to six weeks. And in case you need it, here’s some info on using arnica while pregnant or breastfeeding.
While I haven’t been able to find an arnica cream option to recommend, this organic arnica salve would work well as a substitute.
Makes about 7 ounces
1. Measure your ingredients. If you’re not using distilled water you’ll need to boil the water for 5 minutes to eliminate any bacteria that might be present. I recommend boiling twice the amount of water you plan to use because some will evaporate as it boils.
2. If you’re boiling your water: Boil your water for five minutes. As it’s cooling, place the shea butter and beeswax in a separate pot and melt over low heat. When the shea/beeswax is melted, add in the infused arnica oil and stir until combined. Using your stove, try to get the water and oils to be roughly the same temperature – warm, but so hot that you can’t comfortably place a (clean!) pinky in it.
If you’re using distilled water: Place the shea butter and beeswax in a small pan and melt over low heat. As they shea/beeswax is melting, place the water in a separate pot and warm over very low heat. Once the shea/beeswax is melted, add in the infused arnica oil and stir until combined. Using your stove, try to get the water and oils to be roughly the same temperature – warm, but so hot that you can’t comfortably place a (clean!) pinky in it.
4. Add the water and oil mixture a wide mouth jar. Place your immersion blender at the bottom of the jar and turn it on. Allow it to whir for about 30 seconds without moving the immersion blender at all. Once the liquid at the bottom emulsifies (begins to look like lotion instead of separating like oil and water), begin raising the immersion blender in the liquid to complete the immersion.5. Once the lotion is emulsified, let it sit for 5-7 minutes and then blend it again to make sure it doesn’t separate as it cools. If using a natural preservative, add stir it in with this last mixing.
Without a preservative I store my cream in the fridge and use within two weeks. With a preservative it can be stored at room temperature for up to three months.
If you whip up a batch and it separates, don’t worry! Just melt everything over low heat and blend it again, taking care to give it a whir with the immersion blender every 5-7 minutes until it is completely cool.
Makes about 1 cup
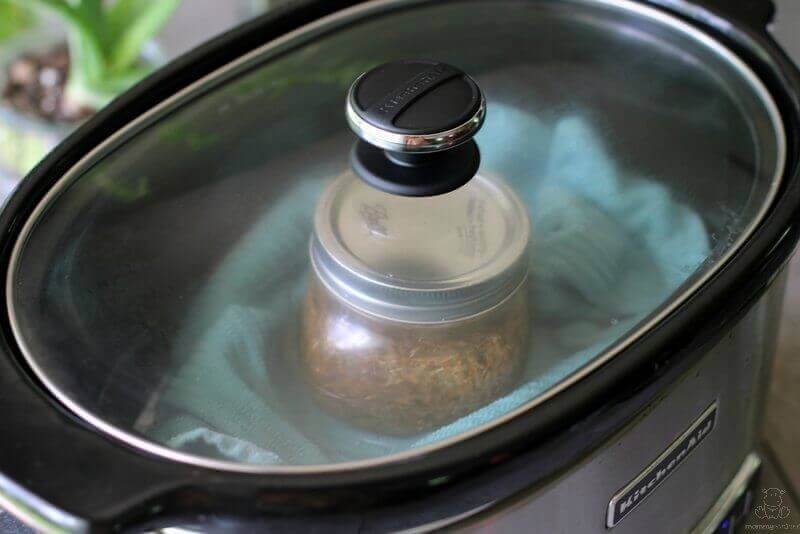
This traditional method may be the best option for preserving certain delicate constituents found in arnica. However, sometimes it’s just not practical to wait 4-6 weeks for a batch. For those times, use the method above.
For making arnica infused oil:
For making arnica cream:
No problem, I’ve created a free ebook for you – Kitchen Apothecary: 25+ Natural Remedies Using Ingredients From Your Pantry – as a gift for signing up for my newsletter. You’ll also get updates when I post about safe essential oils for pregnant/breastfeeding mamas, exclusive gifts and coupons (I was able to give away a jar of free coconut oil to anyone who wanted it recently!), plus other goodies.
Sign up using the form below.