I've installed semi-permanent hair extensions for someone with no professional cosmetology training, far more than the average person. My adventures began in high school when I gave myself a full set of box braids with embroidery thread leftover from my days making friendship bracelets. In my 20s, I dreadlocked my hair, for which I made extensions sewed in, and in my early 30s, I was a regular at micro-rings (human hair extensions shaped like tiny shoelaces that you thread with a bead through slivers of your own hair). As a result, I’ve alternated between crochet braiding for the last ten years when I want my natural texture and tape-in extensions when I want straight hair for a spell.
When you research tape-in human hair extensions, the number one piece of advice you’ll find online is to go to a professional because you can’t possibly perform this task well yourself. By far, the process is the simplest of all semi-permanent extensions but, like anything, can be damaging if you do it incorrectly. Thankfully, you needn’t heed that advice because I’m here to tell you how to safely DIY tape-ins so they look great, last a while, and cost about 10% of what you’d pay in a salon. These tips have been approved by hairstylist, Manic Panic ambassador, and educator Nico Norris.
The act of installing tape-ins, which we’ll review in depth below, involves sandwiching two extension pieces in-between bits of your own hair. The tape on each extension faces internally, meaning the hair is taped to both your own hair and itself. It can last for about a month, but some people keep them in for up to two. The hair can be reused if you remove the adhesive and apply new adhesive strips to the hair wefts. And it isn’t so much the installation of tape-ins that requires finesse, as where you place them and how you treat your own hair so that they blend as well as possible. We will, of course, review that, too. Below is a DIY guide for beginners, with tips and tricks to make your hair life more exciting—no salon needed.
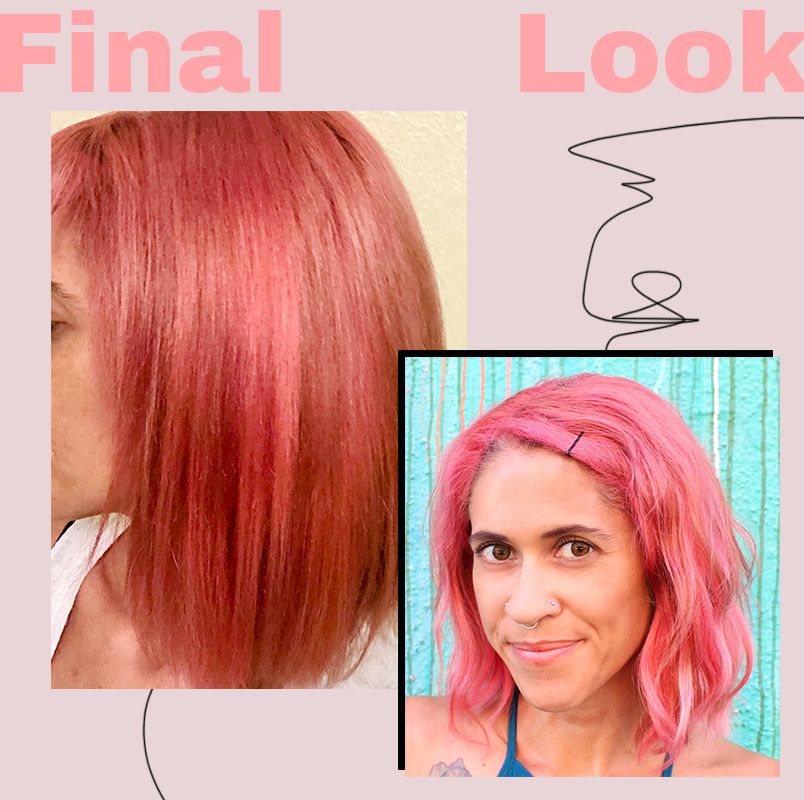
I created this guide using my own recent hair extensions, which I selected for two reasons: to combat my growing-out shaved side that’s significantly shorter than the rest of my hair and add dimension to my bright hair color. So in the two final image photos, pretty much all the hair you see on the right side of my head below my ear is extensions, as are the lighter pieces near the bottom on the left side.
I intentionally bought cheaper hair for this tutorial than I normally do because I understand not everyone can spend big money. And since saving money is the point of DIY’ing, it made the most sense to get an easy-to-find, inexpensive choice. Because there was no hair available in the pinky-peach fashion color I am presently sporting, I purchased color 613 (platinum blonde). I dyed it myself with the same semi-permanent dye as my own hair. Also, I intentionally didn’t flat iron the extensions after they dried on a towel so they’d be more visible in the installation step images.
Once you have the hair, remove it from the packaging, then follow these steps:
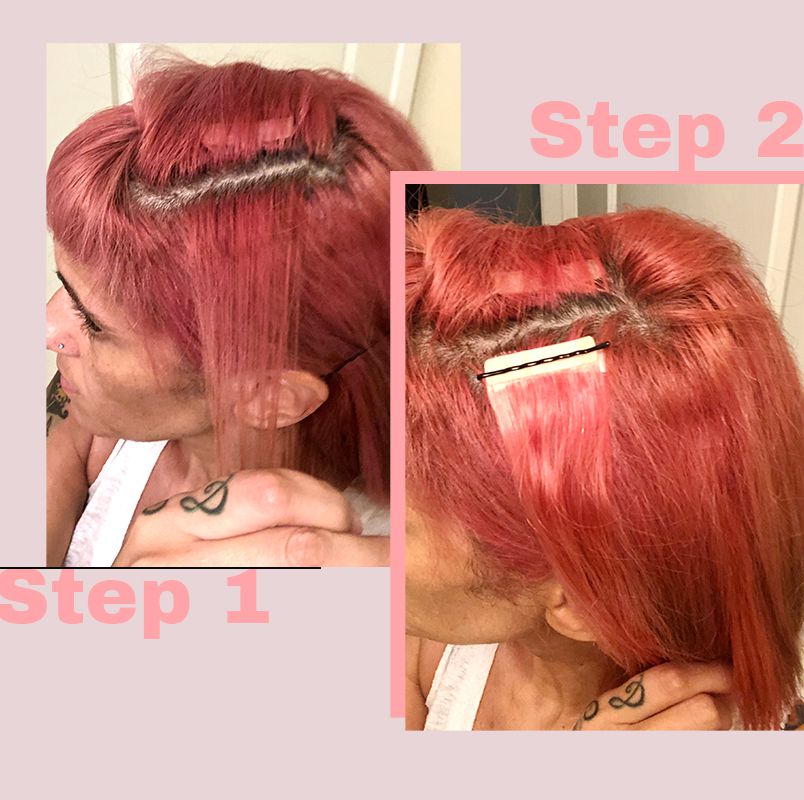
Ariane Resnick/Design by Cristina Cianci
Ariane Resnick/Design by Cristina Cianci
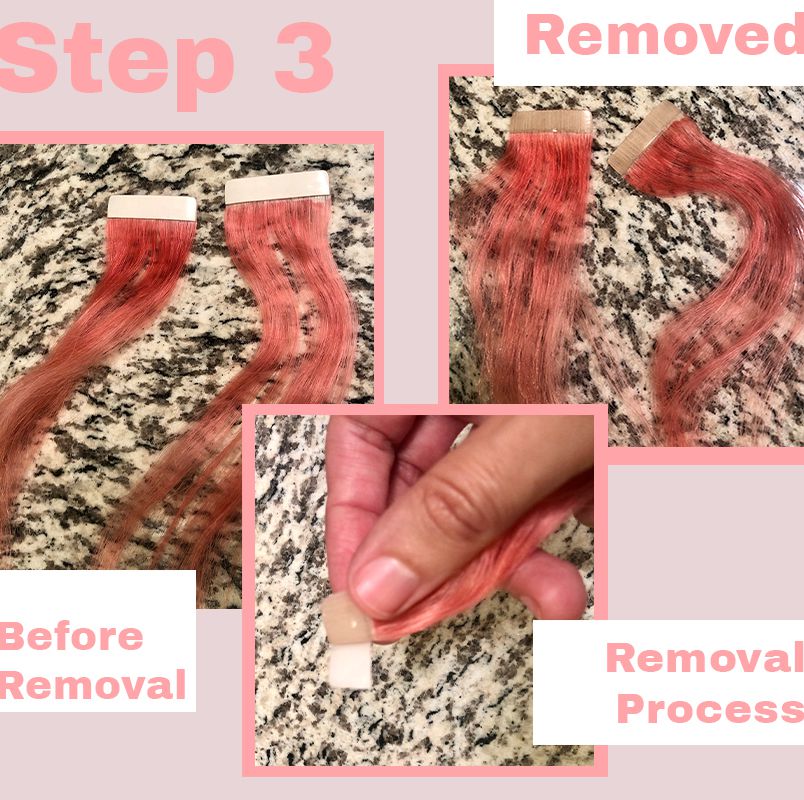
Ariane Resnick/Design by Cristina Cianci
With two packages of hair, you’ll have enough for twenty sandwich pieces, sufficient to add significant volume and/or color. The bobby pin practice step will prevent mistakes or odd placements, so use that until you have complete confidence in placement. A few notes for keeping them looking as good as possible:
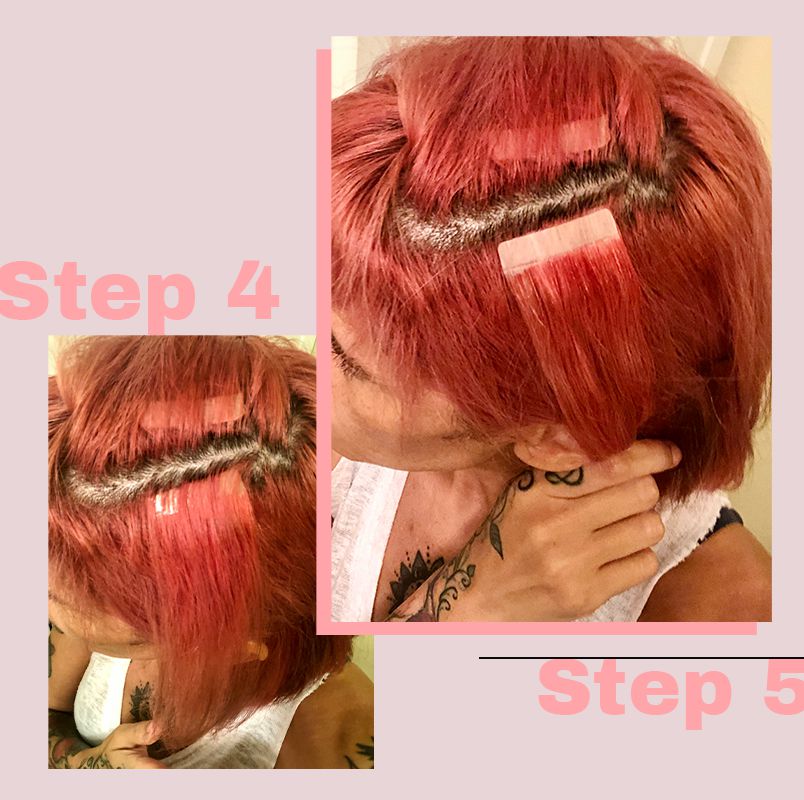
Ariane Resnick/Design by Cristina Cianci
When ready to remove your extensions, use a thick oil like coconut or an adhesive remover made for hair glue and tape. Rub it into the extension sandwich root, pushing with your fingers to separate the sandwich, and gently remove the extensions. Use a fine-tooth comb to release any bits of tape left behind, and wash thoroughly.
DIY’ing tape-in extensions may seem daunting at first, but once you get the hang of it, the process is swift. In addition, installing your own extensions gives you the freedom to change colors without damaging your own hair, helps to disguise awkward grow-out phases, and gives you the pleasure of long hair without a long-term commitment—all at a small fraction of the professional cost.
Everything You've Ever Wanted to Know About Getting Tape-In Extensions